


When it comes to transforming a room, few things are as impactful as painting a wall blue. Whether you’re looking to add a calming seaside vibe, create a bold accent wall, or bring sophistication with a deep navy hue, blue offers endless possibilities. But there’s more to painting a wall than just picking a color and grabbing a brush. Proper preparation, technique, and finishing touches can elevate your space like a pro.
This guide walks you through everything you need to know to paint a wall blue—from choosing the right shade to perfecting the final coat. Whether you’re a first-time painter or a seasoned DIYer, these tips will help you achieve flawless results.
Why Choose Blue
Psychology of Blue
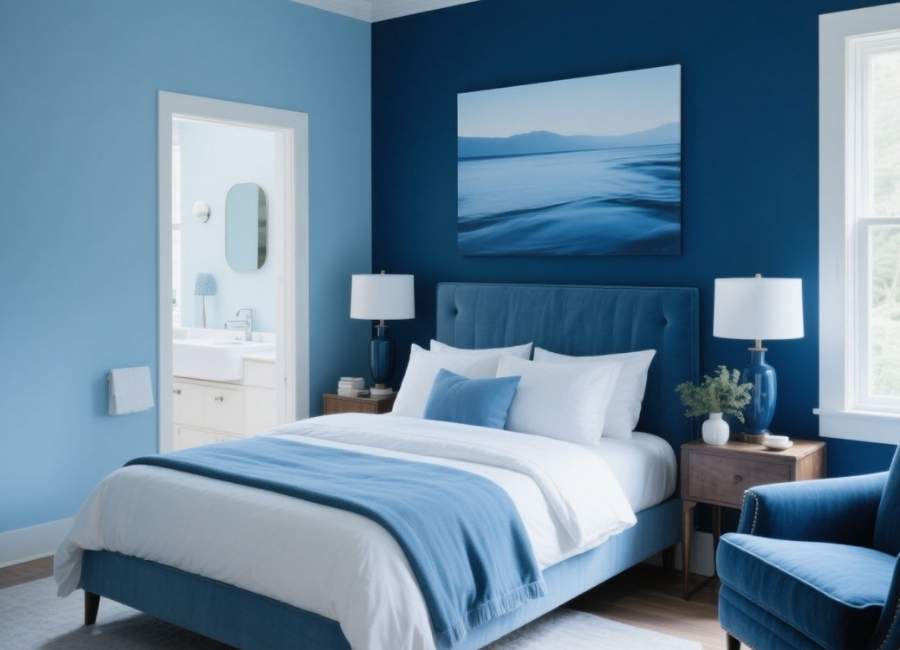
Blue evokes feelings of calm, trust, and tranquility, making it an excellent choice for any room in your home. Lighter shades add a sense of openness and serenity, perfect for bedrooms and bathrooms. On the other hand, darker blues exude elegance and can make living rooms or offices feel grounded and cozy.
Versatility of Blue
One of the greatest strengths of blue is its versatility. From soft pastels to bold royal tones, there’s a shade that suits any design style. Blue pairs seamlessly with a variety of colors—including whites, grays, wood tones, and even metallic accents.
Preparation is Key
Painting a wall isn’t just about rolling paint onto a surface—it’s about laying the groundwork for a flawless finish. Here’s how to start:
Step 1. Choose the Right Shade
Not all blues are created equal. When selecting your shade, consider the room’s purpose, natural lighting, and surrounding décor. For example:
- Light blue hues like sky or baby blue create an airy, serene atmosphere.
- Rich, dark blues like navy or midnight blue add drama and sophistication.
- Muted blues such as teal or slate bring a modern, understated feel.
Pro tip: Test out a few sample patches on your wall to see how they look in different lighting throughout the day!
Step 2. Gather Your Supplies
Ensure you have everything you need before you start. Here’s your checklist:
- Paint (don’t forget to calculate the square footage of your wall to know how much you’ll need)
- Painter’s tape
- Drop cloths
- A paint roller and tray
- Angled paintbrush for edges and corners
- Primer (if necessary)
- Sandpaper (medium and fine grit)
- Spackling paste (for patching holes)
- A ladder (if painting a high area)
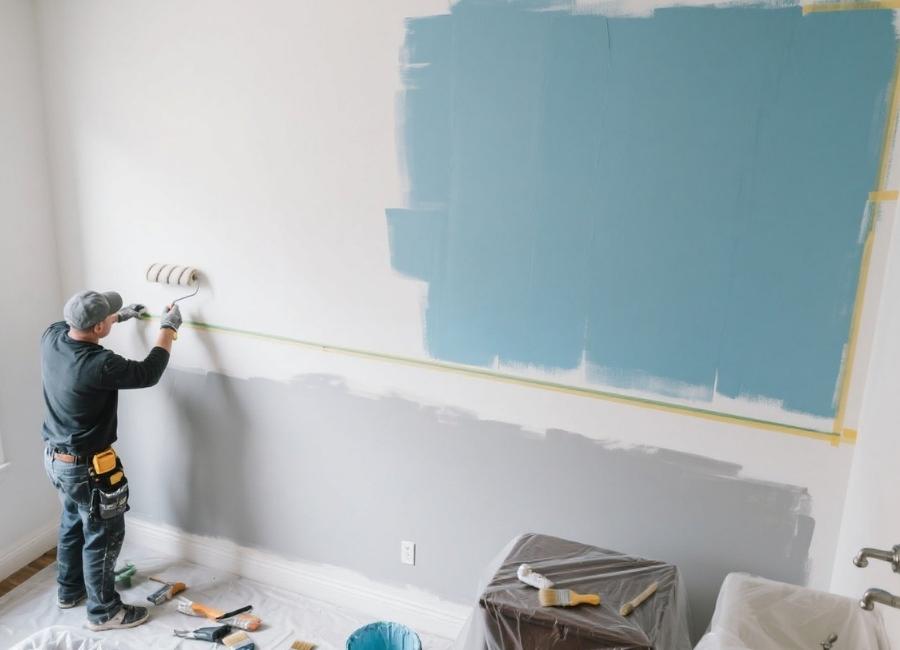
Step 3. Prep the Wall
Proper preparation ensures smooth and even paint application. Don’t skip these steps:
- Clean the Surface: Dust, grease, or dirt can cause uneven coverage. Wipe the wall with a damp cloth and mild detergent, then dry it thoroughly.
- Fix Imperfections: Use spackling paste to fill holes or cracks, and sand down bumps or loose paint. Finish with fine grit sandpaper for a smooth surface.
- Tape and Cover: Apply painter’s tape along edges, trim, and ceilings. Use drop cloths to protect floors and furniture from drips.
- Prime (if Needed): If you’re painting over a dark color or on a porous surface, apply a primer first for better paint adhesion and a more vibrant final color.
Painting Techniques for the Perfect Finish
Now comes the fun part! Here’s how to paint your wall blue like a pro:
Step 4. Cutting in with Precision
Using an angled brush, start by “cutting in” around the edges of the wall. This means painting the borders near the ceiling, trim, and corners before using a roller. Cutting in ensures clean lines and prevents you from accidentally hitting adjacent areas.
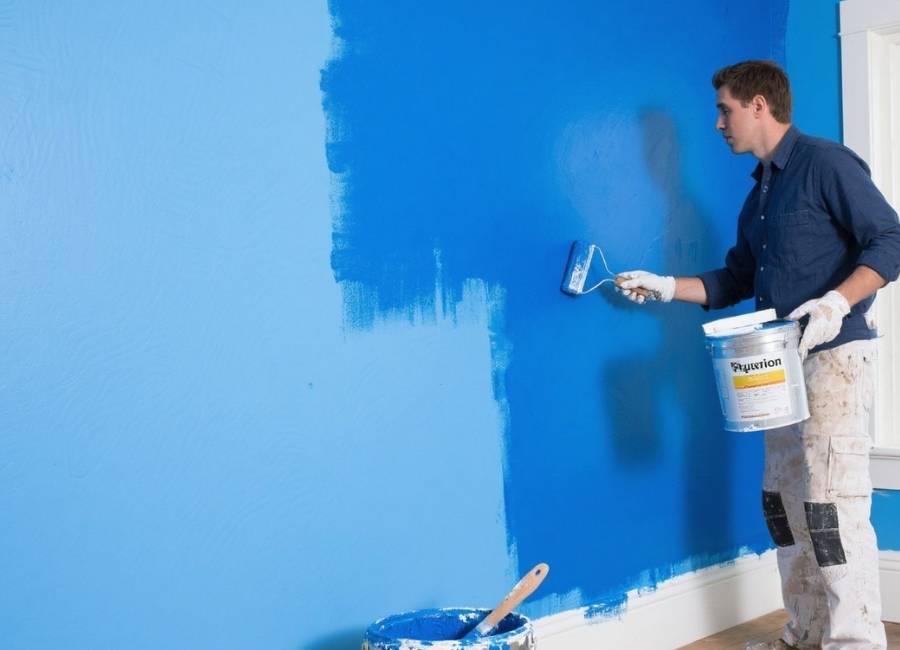
Step 5. Rolling On the Paint
With your roller, apply paint to the larger areas of the wall. Use smooth, even strokes in a “W” or “M” pattern to avoid streaks and lap marks. This technique ensures even coverage and blends the paint seamlessly.
Apply the paint in thin layers rather than thick coats. Two to three coats will typically provide the best results, with adequate drying time (usually 2-4 hours) between each coat.
Step 6. Allow for Proper Ventilation
While the paint dries, make sure the room is well-ventilated. Open windows or use fans to help speed up the drying process and prevent strong paint fumes from lingering.
Step 7. Remove Tape Before the Paint Fully Dries
Once the final coat looks fantastic, carefully peel off the painter’s tape while the paint is still slightly damp. This will prevent any chipping or tearing along the edges.
Adding Finishing Touches
Step 8. Light the Wall to Highlight Its Beauty
Consider the lighting in your room to enhance the new blue wall. Warm lighting can soften a bold shade, while cool lighting can amplify the vibrancy of lighter blues.
Step 9. Decorate Thoughtfully
A newly painted wall is like a blank canvas. Complement the blue by adding:
- Neutral furniture and textiles to balance bold tones.
- Artwork or wall décor that contrasts or accentuates the shade.
- Metallic accents like gold or silver for a touch of elegance.
Common Pitfalls to Avoid
- Skipping Primer:
If you’re covering a dark color or painting on an unfinished surface, primer enhances color vibrancy and ensures better adherence.
- Using Low-Quality Tools:
Cheap rollers and brushes can leave lint or uneven strokes. Invest in quality tools for a flawless finish.
- Not Testing the Color:
Always test paint samples to avoid surprises. Lighting can significantly alter how a color looks on your wall.
- Rushing the Process:
Allow proper drying time between coats. Skipping this step can lead to uneven texture or peeling paint.
Elevate Your Space with Confidence
Painting a wall blue is more than just a home improvement project; it’s an opportunity to make a personal statement. Whether you’re aiming for peaceful, bold, or anything in between, blue offers a solution that’s as timeless as it is versatile. By taking the time to prepare, using the right tools, and following proper techniques, your project will feel rewarding every time you walk into the room.
And remember, you don’t have to go it alone. If you’re unsure about which shade of blue would work best for your space, consulting with an expert or designer can be a game-changer.


