


Hey everyone! Brad Rodriguez here from Fix This Build That. Today, I’m excited to show you three different ways to make a picture frame. Whether you’re just starting out with basic DIY tools or you’re ready to level up your game with some heavy-duty machinery, I’ve got you covered. Stick around, and I’ll guide you through each method step-by-step.
Method 1: Simple Picture Frame with Basic Tools
We’ll start with a simple DIY frame that you can make using just a mitre saw and a handheld router. This is the perfect project for beginners or those working with limited tools.
To get clean, accurate cuts, I recommend using an auxiliary fence on your mitre saw. This simple add-on helps make your cuts more precise. I made mine from half-inch plywood, screwing it together at a right angle. Just make sure the screws are out of the blade’s path. Most mitre saws have holes for attaching extra fences, which is a helpful way to boost accuracy.
Once your fence is in place, I set my saw to a 45-degree angle to cut the first mitre, testing as I went to ensure everything lined up correctly. You can also use a drafting square and some reference lines on the fence to make sure your cuts are spot on.
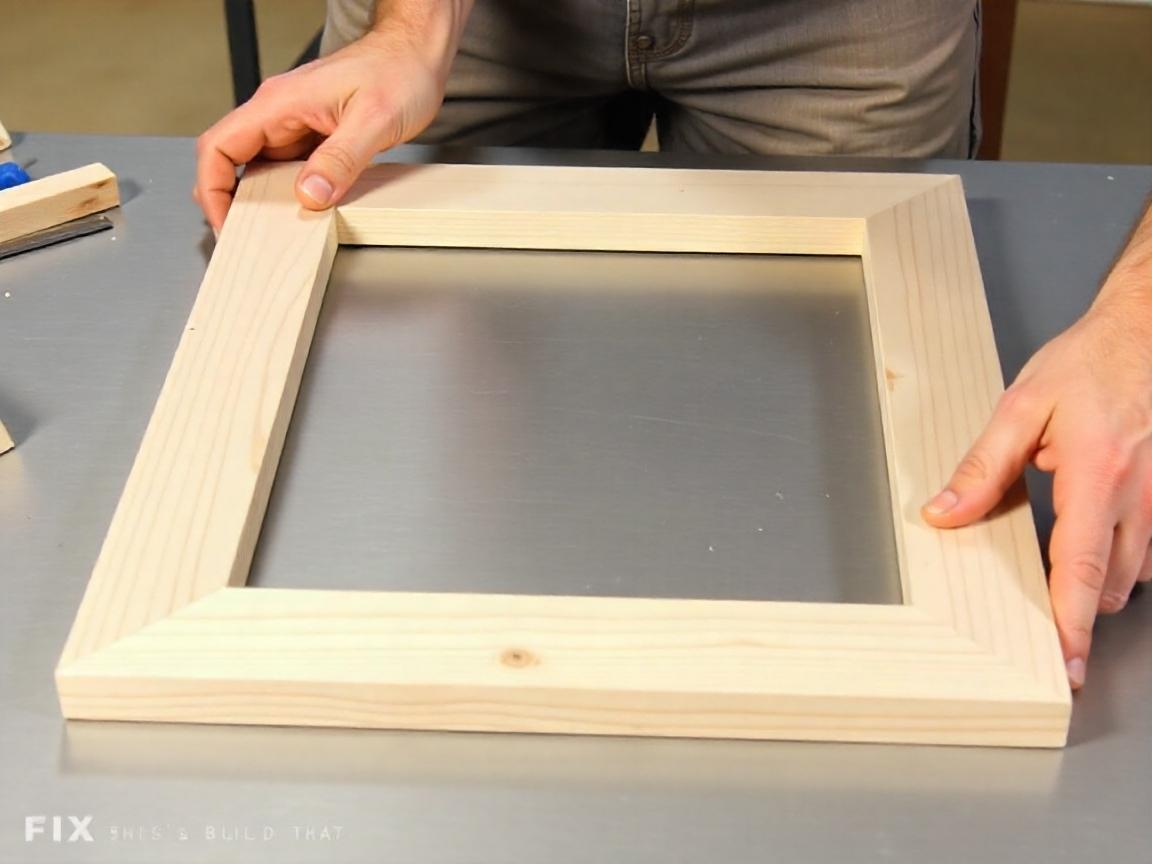
For this frame, I’m using 8-foot select pine 1×2 boards (easy to find at most home improvement stores). (Make This Easy DIY Wood Picture Frame With Trim Molding, n.d.) First, I cut the board in half—one board gives you enough material for two 8×10 frames.
Next, I used a handheld router with a 3/8-inch rabbeting bit to cut a rabbet (a recessed area for the glass and artwork) along one edge of the wood. After making one shallow pass, I deepened the cut to the full 3/8-inch depth.
Next, it’s time to cut the mitres for the frame sides. When measuring, focus on three important numbers: the outside length, the inside length, and the rabbet length. A helpful tip is to line up the end of the rabbet with your size mark. This way, your artwork and glass will fit perfectly.
For cutting the mitres, I stacked the pieces on top of each other to ensure both cuts were identical. Once I had the pieces cut to size, I used tape (no fancy clamps needed) to hold the frame together while gluing. Tape helps to keep everything tight without any slippage. (Slippery Tape has a Host of Uses, 2015)
For reinforcement, I used corrugated fasteners (these are like staples that secure the mitre joints). (Use of Corrugated Fasteners, n.d.) They did work, but I had a bit of a challenge getting them in place, and they didn’t go as smoothly as I hoped. However, the result was still pretty solid, even if the process wasn’t perfect.
Finally, I stained the frame using Minwax Jacobean stain for a dark, rich finish. After applying three coats and letting it dry, I sealed it with a satin lacquer spray to give it a nice sheen.
Method 2: Upgraded Hardwood Frame with a Table Saw
For the second frame, we’re stepping things up with hardwood and incorporating a table saw into the process. This is a more advanced technique, but I’ll walk you through it.
I started by marking out the profile for the frame on the end grain of oak. The first cut I made was a subtle chamfer on the inside edge of the frame. Using a 15-degree blade tilt and setting the fence to a half-inch, I cut along the length of the frame, making sure to use a feather board for safety and consistency.
After the chamfer, I moved on to the rabbet for the glass and artwork. I raised the table saw blade to ¼-inch and used the fence to cut along the layout lines. A second pass was made after flipping the board over, ensuring everything lined up perfectly.
This is where attention to detail is key. Avoid kickback by always cutting on the outside of the blade. After the cuts were made, I cleaned up any saw marks using a card scraper.
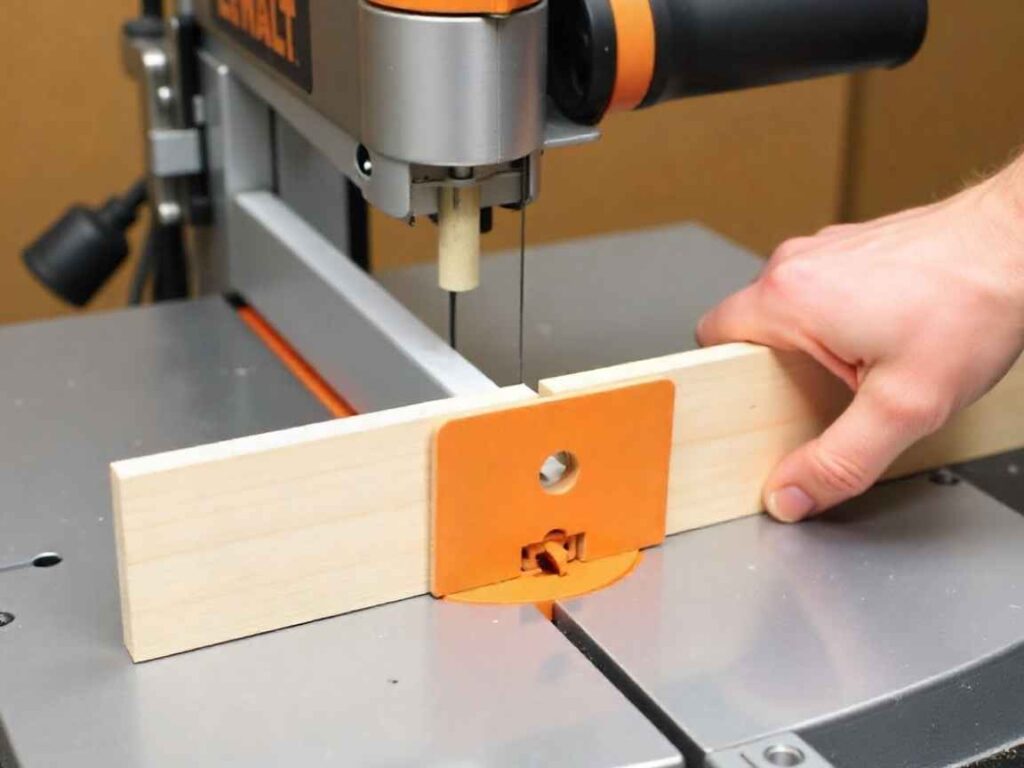
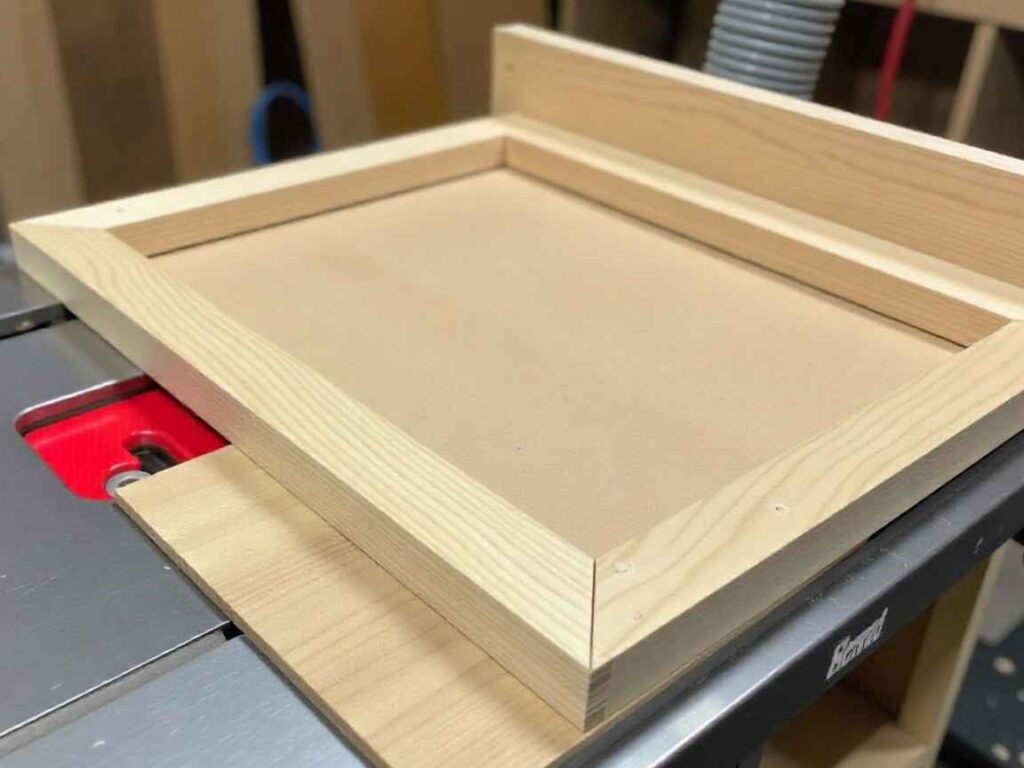
When it came to assembly, I used a web clamp to hold the mitred pieces in place during the glue-up. This clamp makes it much easier to keep everything square. I also used splines to add extra support to the mitre joints. (Spline jig for mitered joints, 2023) I cut slots in the corners with my table saw, then made little wooden splines to fit into the slots. This step helps reinforce the frame for durability. (Reinforcing Heavy Frame Corners/Joints, n.d.)
For finishing, I went with a whitewash using Minwax whitewash pickling stain. This gave the oak a light, beachy feel, perfect for a frame I’ll be using to display some beach photos.
Method 3: High-End Router Table Frame
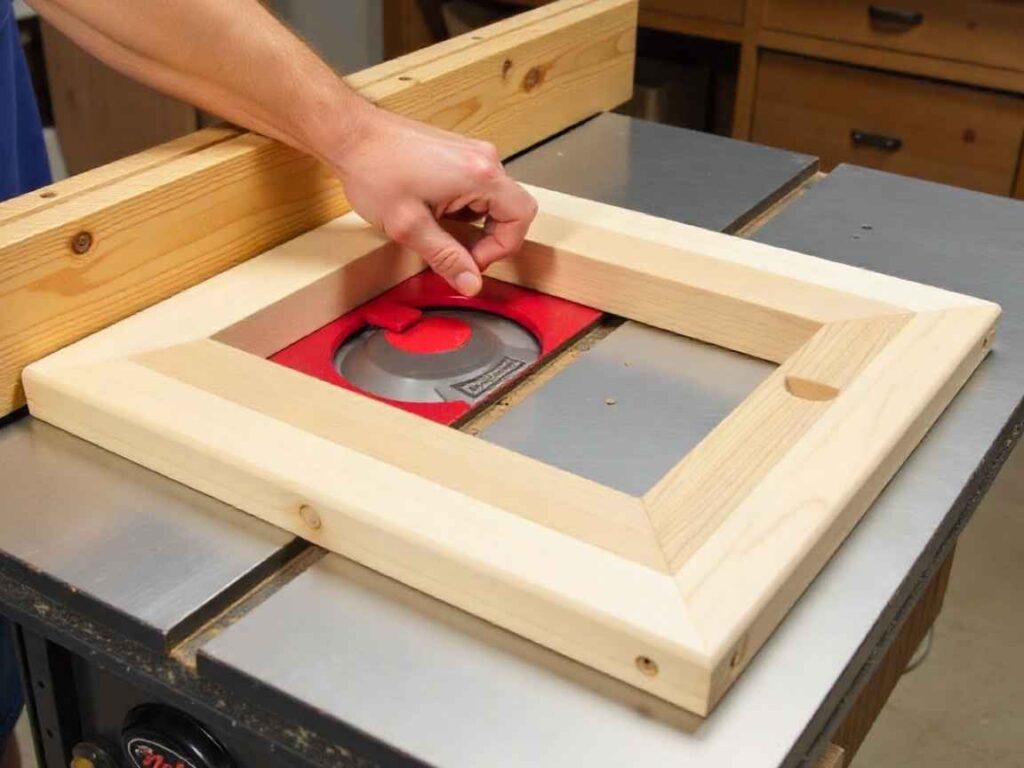
For the final frame, we’re going all out. This one is for those who have access to a router table and want to create a custom profile for the frame. The router table I used is the Jet Cast-Iron Router Table, which is incredibly stable and precise. (Jet packs features into new router table, 2018)
Using a cove bit, I created a sweeping curve along the inside edge of the frame. After a few passes to get the right profile, I switched to a straight bit to cut a subtle groove along the inner edge. This is a small detail, but it adds a beautiful shadow effect when the frame is finished.
The router table’s dust collection system was fantastic. No mess to clean up, and that’s always a win in my book. (Johnson & Roland, 2011)
After finishing the cuts, I used the mitre saw for the final mitre cuts, using the same technique as before. This time, I paired the taped corner method with the web clamp, which helped me achieve my best results yet.
I chose to finish this frame with a clear satin lacquer to showcase the natural beauty of the mahogany. It’s a simple, elegant look that lets the wood shine.
Final Thoughts
No matter what tools you have, you can make great-looking picture frames. You might start with a simple pine frame or try a more detailed hardwood version with a custom profile. Each method offers something different. Try out various woods and finishes to find what suits your style best.
I hope this guide gave you some useful tips for your next woodworking project. Be sure to let me know in the comments which technique you’re most excited to try. And as always, if you enjoyed this, hit that subscribe button for more woodworking tutorials. Now, go ahead and get out there and build something amazing!
Until next time, happy woodworking!


