


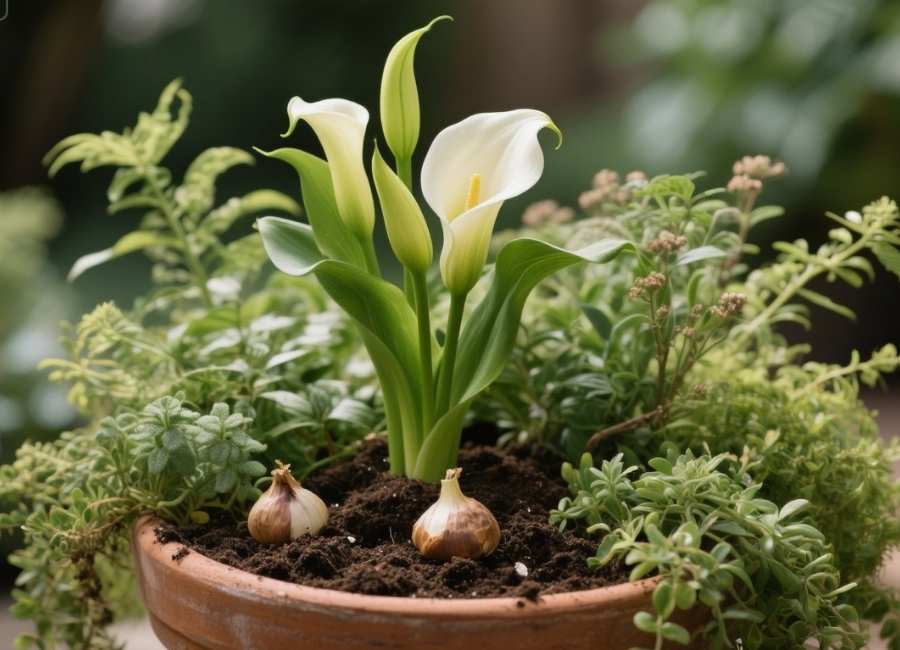
Calla lilies make any garden look beautiful with their elegant, trumpet-shaped flowers and tropical feel. Growing them in pots is a great option if you have limited space or live in a cooler climate. This guide will show you how to create a lovely container display with calla lilies as the main feature.
You’ll find out how to mix calla lilies with other plants for a full, layered look using the “thriller, filler, and spiller” method. We’ll also share tips on planting, fertilizing, and caring for your pot so it grows well all season. By the end, you’ll feel ready to plant a beautiful calla lily container that adds a tropical touch to your home.
What is the “Thriller, Filler, Spiller” Method?
Before we start planting, let’s talk about a simple but effective container design principle: the “thriller, filler, spiller” method. This technique helps create balanced and visually interesting pots.
- Thriller: This is the main attraction, usually a tall, eye-catching plant that adds vertical height and drama. In our case, the calla lily is the perfect thriller.
- Filler: These are bushy plants that go around the thriller and fill up the middle of the pot. Coleus works well as a filler.
- Spiller: These plants go at the edge of the pot and hang over the sides, making the container look softer and more flowing. Variegated vinca vine is a classic choice for a spiller.
Step-by-Step Guide to Planting Calla Lilies in a Pot
Step 1: Gather Your Plants and Materials
Start by gathering all your supplies. For this project, you’ll use a calla lily, coleus, and vinca vine to make a full and attractive arrangement.
For the Plants:
- Thriller: Use a pre-sprouted calla lily bulb. Pre-sprouting helps the plant grow faster, especially if you live in a cooler area. The ‘Black Tango’ variety has striking dark flowers and speckled leaves.
- Filler: Coleus plants, which you can grow from seed or buy. If they get tall and thin, pinch them back to help them grow bushier.
- Spiller: Variegated vinca vine. It’s a hardy perennial in warmer areas (USDA Zone 7 and up), but you can bring it indoors for winter if you live in a colder place like Zone 5.
For the Container and Soil:
- Pot: Pick a container that’s big enough for all your plants. It doesn’t have to look fancy, since the plants will be the main attraction. Reusing old nursery pots is also a good way to recycle.
- Potting Mix: Use a good potting mix made for containers, either homemade or store-bought.
- Fertilizer: Choose a slow-release fertilizer, such as Osmocote, to give your plants steady nutrients all season.
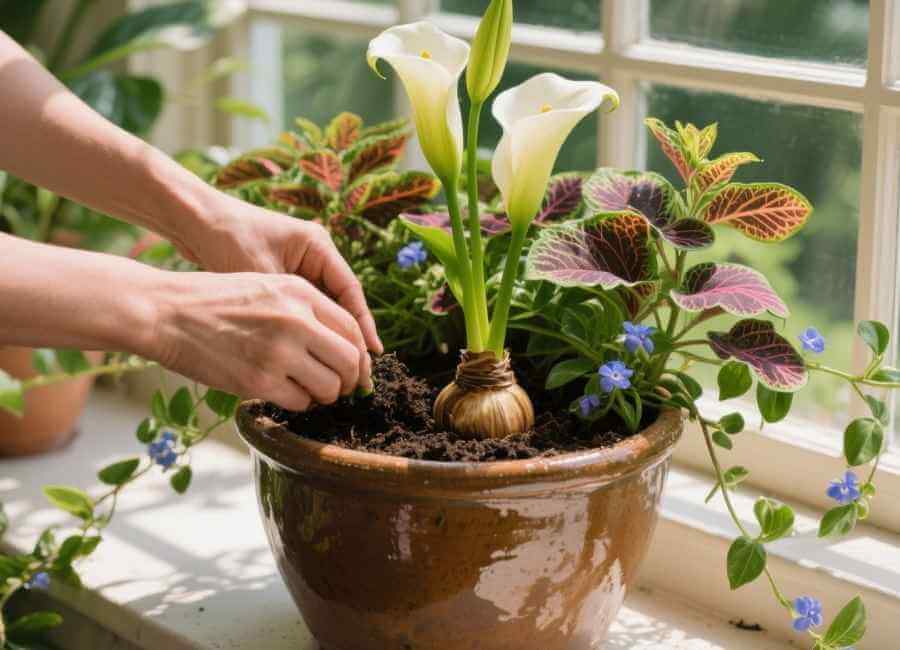
Step 2: Plant Your Calla Lily (The Thriller)
Where you place your thriller depends on how it will be perceived. If people see it from all sides, plant the calla lily in the centre. If the pot will sit against a wall, put the calla lily toward the back.
- Dig the Hole: Make a hole in the center of your pot that’s deep enough for the calla lily. The top of the bulb’s soil should sit about one or two inches below the rim.
- Add Fertilizer: Sprinkle a small pinch of slow-release fertilizer into the planting hole.
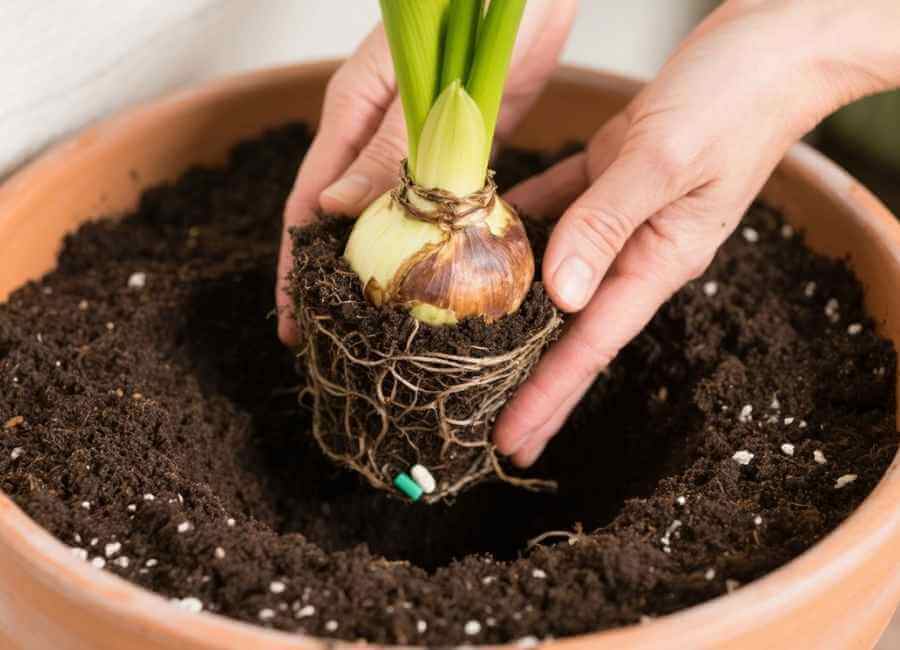
- Prepare the Plant: Gently squeeze the sides of the nursery pot to loosen the calla lily. If the roots are tightly packed, gently pull them apart with your fingers. This helps the roots spread out in the new soil.
- Plant and Backfill: Put the calla lily in the hole, then fill in around it with potting mix. Press the soil down gently to hold the plant in place.
Step 3: Add Your Vinca Vines (The Spillers)
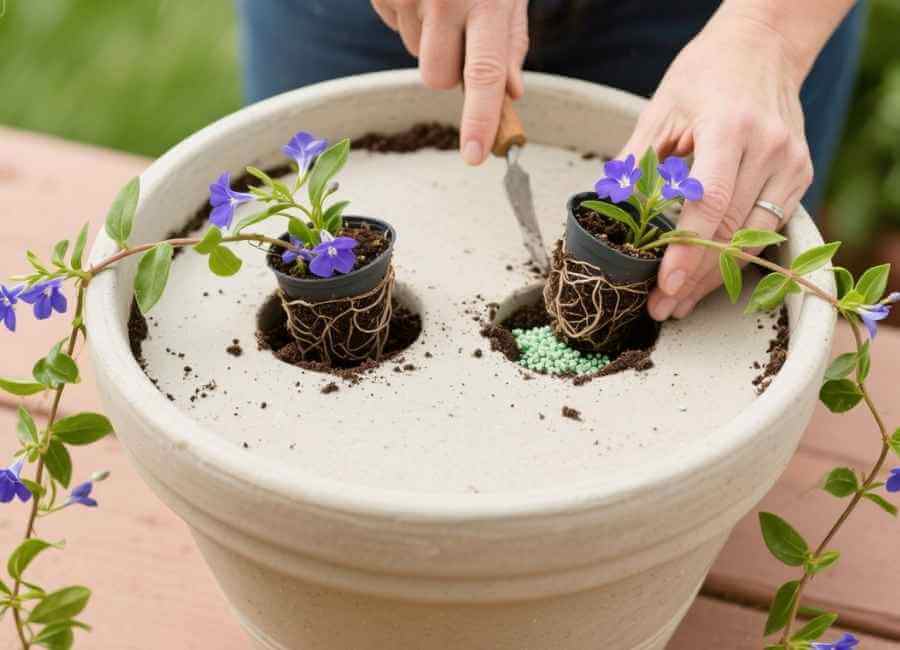
Now add the spillers. Putting them on opposite sides of the pot gives a nice, balanced look as they trail over the edges.
- Dig Holes: Make two holes on opposite edges of the container for the vinca vines.
- Add Fertilizer: Put a pinch of fertilizer in each hole.
- Plant the Vines: Remove the vinca vines from their pots. If the roots are crowded, remove some extra soil from the root ball. Put one vine in each hole and fill in with potting mix. Vinca vines typically proliferate once they have sufficient space to grow.
Step 4: Complete with Coleus (The Fillers)
Now, fill the remaining gaps with your coleuNext, fill the empty spaces with your coleus plants.s between the calla lily and the vinca vines.
- Add Fertilizer: Add a small amount of fertilizer to each hole.
- Plant the Coleus: Carefully separate your coleus plants and put them in the holes. If they’re in a big clump, you can plant them together and let them grow as a group. Fill in with soil and press it down gently.
Step 5: Water and Pinch Back
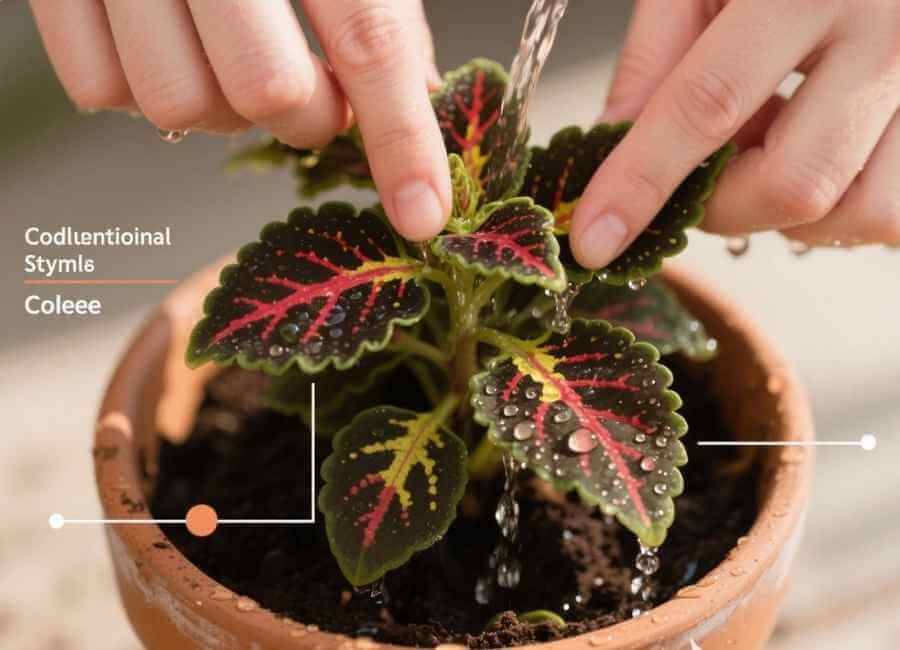
After planting, water the container well until water runs out the bottom. This settles the soil and helps the plants adjust.
If your coleus plants are tall and leggy, this is a good time to “pinch” them back.
- How to Pinch: Follow a stem down to a set of leaves and snip or pinch off the stem just above them.
- Why Pinch? Pinching helps the plant grow more branches, so you get a fuller, bushier plant instead of just one tall stem. It may seem tough, but it’s good for the plant’s health and looks.
Caring for Your Calla Lily Container
At first, your new container might look a bit empty, but with some time and care, it will grow into a full and colorful display.
- Sunlight: Put your pot where all the plants get the right amount of sun. Calla lilies usually like full sun or some shade.
- Watering: Keep the soil moist but not soggy. Pots can dry out fast, especially in hot weather, so check the soil every day.
- Fertilising: The slow-release fertiliser you added should last for months. If the plants stop growing as quickly, add some liquid fertiliser every few weeks.
By following these steps, you’ll have a beautiful container garden that adds bright colour and a tropical feel to your patio, balcony, or front door.
Your Next Steps
Now that your calla lily container is planted, you can relax and watch it grow. In a few weeks, the plants will fill out, and you’ll enjoy lovely flowers and leaves.
Remember, gardening takes time and every plant grows at its own pace. If your container doesn’t look perfect right away, don’t worry. With patience, you’ll soon have a display you can be proud of.


