Tiling a shower is a great DIY project that adds style and value to your home. With some planning and the right tools, you can achieve a professional finish. This guide explains how to install subway tile with a decorative glass mosaic strip, helping ensure a smooth project from start to finish.
We’ll cover mapping your design, cutting, and placing tiles. By the end, you’ll feel confident to tackle a DIY subway tile shower and create a space to enjoy for years.
What You’ll Need
Before starting, gather your tools and materials. Being prepared will make the process smoother.
Tools:
- Laser level
- Regular level (for backup)
- Tile cutter (score-and-snap tool)
- 4-inch grinder with a ceramic bit
- Quarter by three-eighths trowel
- Pail and sponge
- Mixing drill for thin-set
- Tape measure
- Pencil or marker
Materials:
- 4×12 glossy ceramic subway tiles
- Glass mosaic sheets
- Plastic tile edging
- Thin-set mortar (a non-sag, white variety is ideal for the mosaic)
- 1/8-inch tile spacers
- Wedge spacers
Step 1: Map Out Your Tile Layout
Preparation is key for a good tile job. Mapping your design centers the pattern, reduces cuts, and balances finished walls.
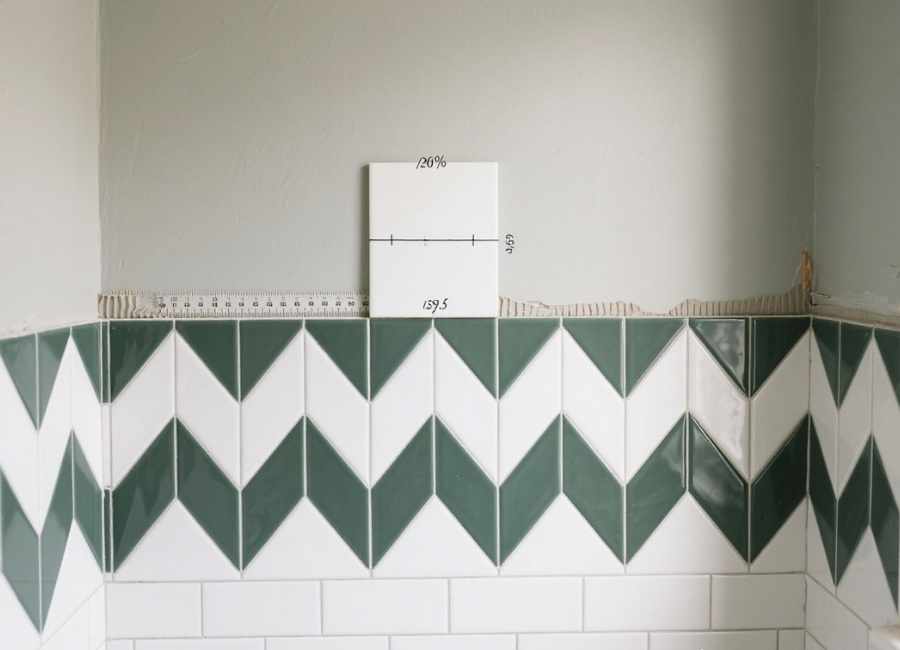
First, measure your back wall and find the center. For a standard 59-inch wall, your center line will be at 29.5 inches. To visualize your layout, place a few tiles on the wall, starting with a grout line at the center. A typical subway pattern uses a 50% offset, meaning each row is staggered by half a tile.
Check how your tiles will end at the corners. Ideally, you want to avoid cutting skinny slivers of tile, as they can look awkward and are difficult to cut. By starting with a grout line in the center of the wall, you should end up with a half-tile cut at each corner, which looks great. If you start with the center of a tile on your line, you should end with a full tile. Test both to determine which one works best for your space.
Step 2: Set Your First Row with a Laser Level
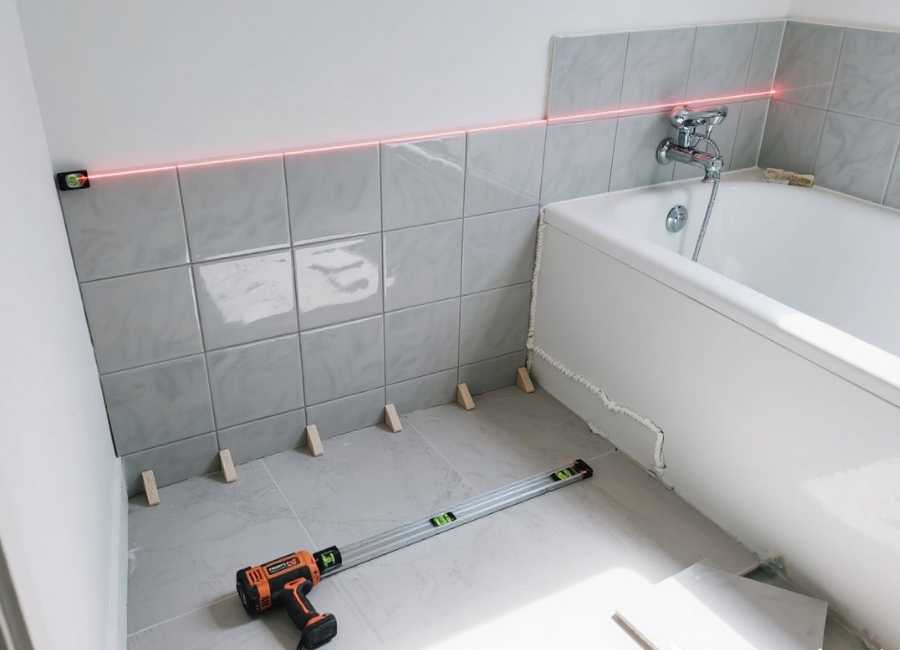
Your first row is crucial. If it’s not level, all following rows will be off, making the final result uneven. A laser level projects a straight line across all walls for consistency.
Tubs are rarely perfectly level. Use a laser to mark the top of your first row. Cut each bottom row tile to fit between the tub and the laser line. This creates a level base for your wall.
Mark cut lines, cut tiles, and dry-fit your first row. Wedge spacers create a gap between tile and tub for movement, which you’ll fill with silicone later.
Step 3: Mix Your Thin-Set and Start Tiling
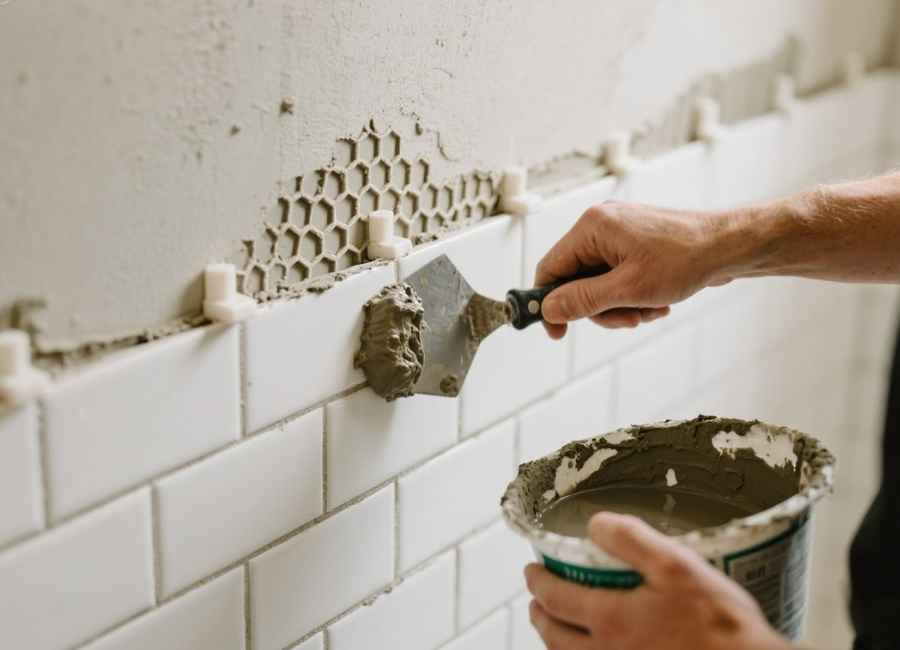
With your first row ready, mix thin-set mortar. Add water to your pail first, then powder, and mix until smooth and clump-free. It should look like thick peanut butter. Let it sit for 10 minutes to “slake,” then mix again.
Install plastic edging on your shower corners before you start setting tiles. Apply a small amount of thin-set to attach the edging.
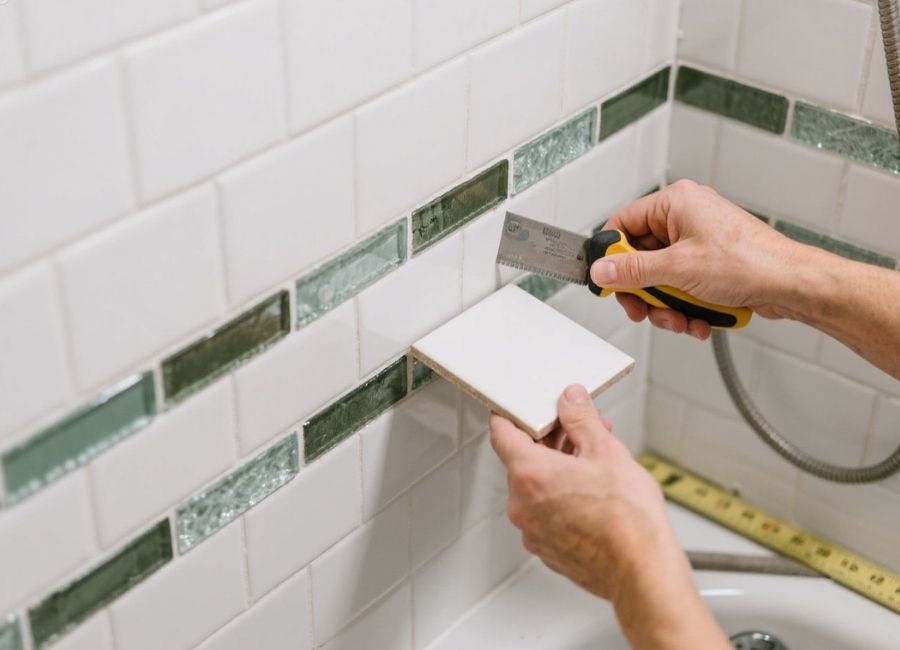
Apply thin-set with a quarter-by-three-eighths trowel. Subway tiles’ honeycomb backs adhere well with this size. Press tiles in with a slight slide to collapse ridges. Use spacers to keep even lines. Clean excess mortar as you go with a damp sponge.
Once your first row is set and level, build up like blocks. Apply thin-set, start with a half-tile for the offset, use spacers, and keep building upward.
Step 4: Incorporate the Glass Mosaic
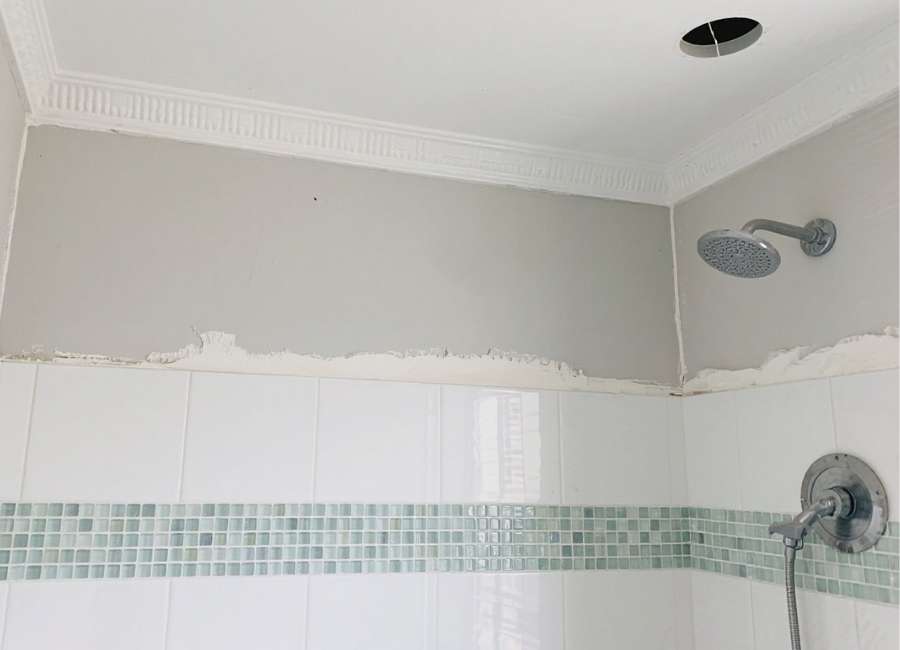
A glass mosaic strip gives a custom touch and solves layout issues. Adjust its height to avoid slivers of tile at the shower top, ensuring a full or nearly full tile at the ceiling.
A decorative band typically sits around eye level, approximately five feet above. You can measure down from the ceiling to plan your layout and adjust your mosaic height to ensure slivers aren’t needed.
Use white, non-sag thin-set for glass mosaics. White helps maintain color, and non-sag mortar supports heavy mosaics without spacers.
Cut mosaic sheets to width with a grinder from the back to reduce chipping. Apply white thin-set and press the mosaic sheet in place, keeping it level. The non-sag mortar will support it while you continue tiling.
Step 5: Cutting Tiles for Fixtures
Could you make holes just big enough for the pipe, as the fixture cover will hide the cut?You’ll need to cut tile holes for the faucet and handle. Make holes just big enough for the pipe, as the fixture cover will hide the cut.
To make a cutout, mark the lines on the glaze. Score with the grinder, then flip and cut from the back to avoid chipping. With practice, you’ll get precise cuts for your plumbing fixtures.
Step 6: Finishing and Cleaning Up
After tiling, remove spacers the next day. Clean out excess mortar from grout lines within 48 hours before it cures.
Let tiles set 24-48 hours before grouting. Stay patient, keep lines straight and clean, and rely on your laser level for precision.
Your New Shower Awaits
These steps will help you complete a successful DIY subway tile shower. Planning your layout and leveling your first row delivers a beautiful, professional result you can be proud of.
Ready for your next project? Explore our other DIY guides for more inspiration and tips.