


When the heat becomes unbearable and you need instant relief, a handmade paper fan can be your perfect companion. This timeless craft requires nothing more than a sheet of paper and a few minutes of your time, yet it delivers immediate cooling comfort while adding a touch of personal style to your day.
Whether you’re looking for a quick summer project, need an emergency cooling solution, or want to create decorative pieces for an event, learning how to make a paper fan opens up endless possibilities. This guide will walk you through the entire process, from selecting the right materials to adding your own creative flourishes.
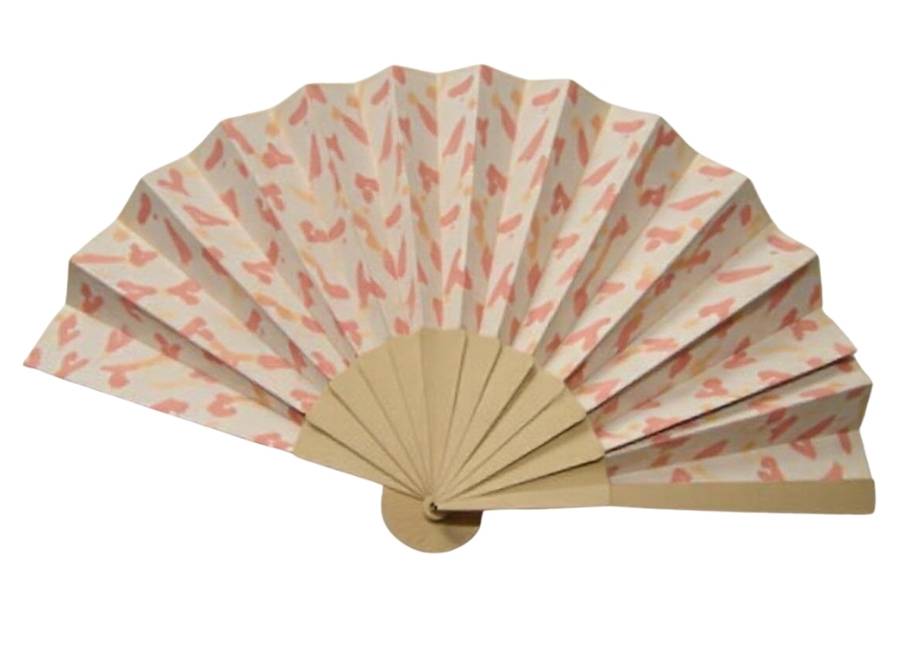
Paper fans have been used for centuries across different cultures, serving both practical and ceremonial purposes. (Gifu fans, n.d.) The beauty of this craft lies in its simplicity—no special tools, no complicated techniques, just the satisfying art of folding paper into something both useful and beautiful.
What You’ll Need to Get Started
Before diving into the folding process, gather these basic materials:
Essential supplies:
- One sheet of paper (8.5″ x 11″ works perfectly)
- Your hands for folding
- Optional: tape, glue, or stapler for securing
Paper selection tips:
Choose lightweight paper for easier folding and better airflow. Regular printer paper works well, but decorative scrapbook paper, wrapping paper, or even newspaper can create unique visual effects. Avoid cardstock or thick paper, as it becomes difficult to fold and less effective for cooling.
The size of your paper determines the final fan size. Standard letter-size paper creates a comfortable hand-held fan, while larger sheets produce bigger fans suitable for decoration or sharing.
Step 1: Position Your Paper Correctly
Start with your paper laid flat on a clean surface. Position it horizontally (landscape orientation) in front of you. This orientation gives you the longest possible folding distance, which translates to more pleats and better airflow in your finished fan.
Smooth out any wrinkles or creases in the paper. These imperfections can interfere with clean folding and affect the fan’s final appearance.
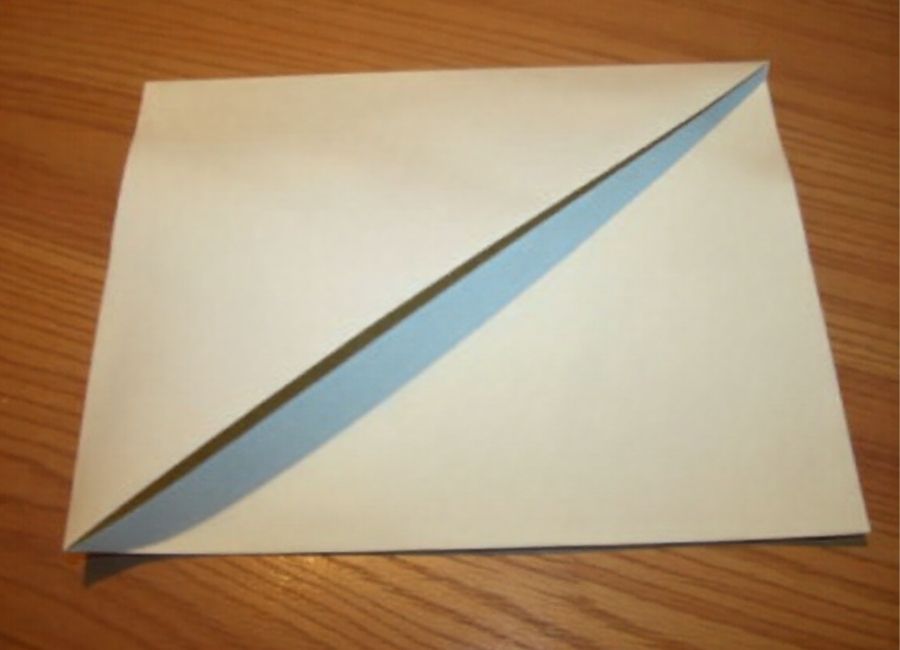
Step 2: Create Your First Fold
Make your first fold by bringing the bottom edge of the paper up about one inch from the bottom. Press firmly along the entire length to create a sharp crease. The width of this first fold sets the pattern for all subsequent folds, so aim for consistency.
This initial fold should be parallel to the bottom edge of the paper. Take your time here—a clean first fold makes the remaining steps much easier and produces a more professional-looking result.
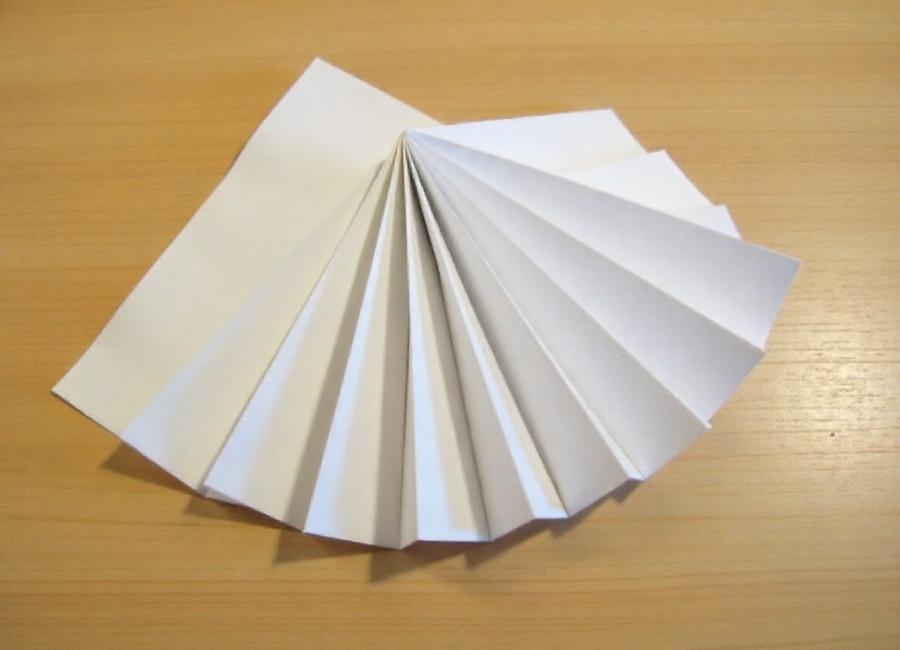
Step 3: Continue the Accordion Pattern
Flip the paper over and make another fold of the same width, bringing the folded edge back down. This creates the classic accordion or zigzag pattern that gives the fan its structure and functionality.
Continue this process, alternating between folding up and folding down, maintaining the same fold width throughout. You should see a series of mountain and valley folds forming across the width of your paper.
Keep the folds tight and parallel. Uneven folds will result in a lopsided fan that doesn’t open smoothly. If you notice your folds becoming uneven, it’s better to start over than to continue with inconsistent pleats.
Step 4: Complete the Pleating Process
Continue accordion folding until you reach the top edge of the paper. You should end up with a long, narrow strip of folded paper that resembles a closed accordion.
Press down firmly on the entire folded strip to reinforce all the creases. This step ensures your fan will hold its shape when opened and closed repeatedly.
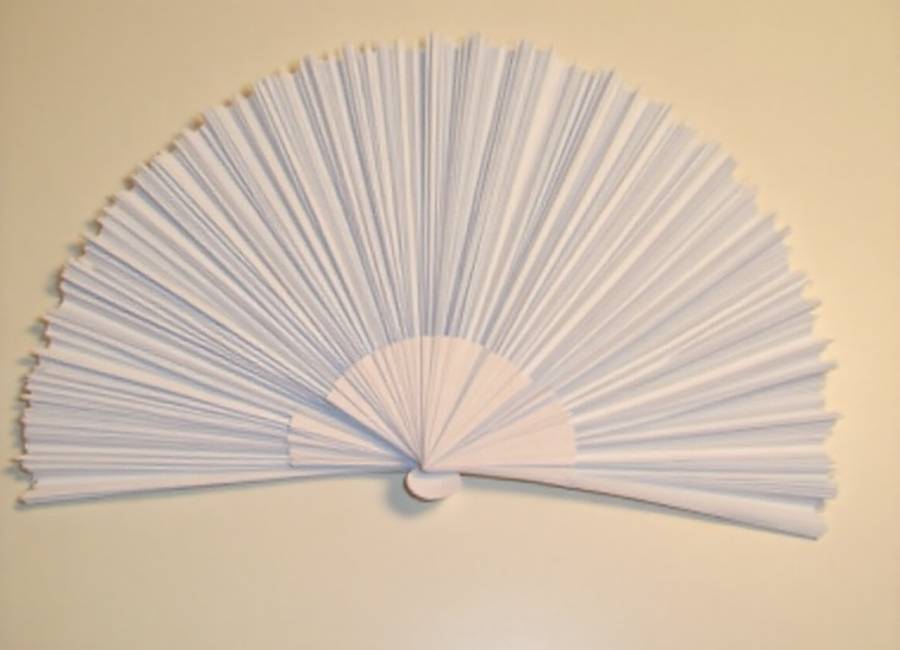
Step 5: Form and Secure Your Fan
Hold the folded paper strip at one end—this will become the handle of your fan. About one inch from the bottom, wrap tape, apply glue, or use a stapler to secure the folds together. This creates the handle and allows the top portion to spread out in a fan shape.
Gently spread the free end of the folded paper to form the fan blade. The accordion folds will naturally want to spread out, creating the characteristic fan shape.
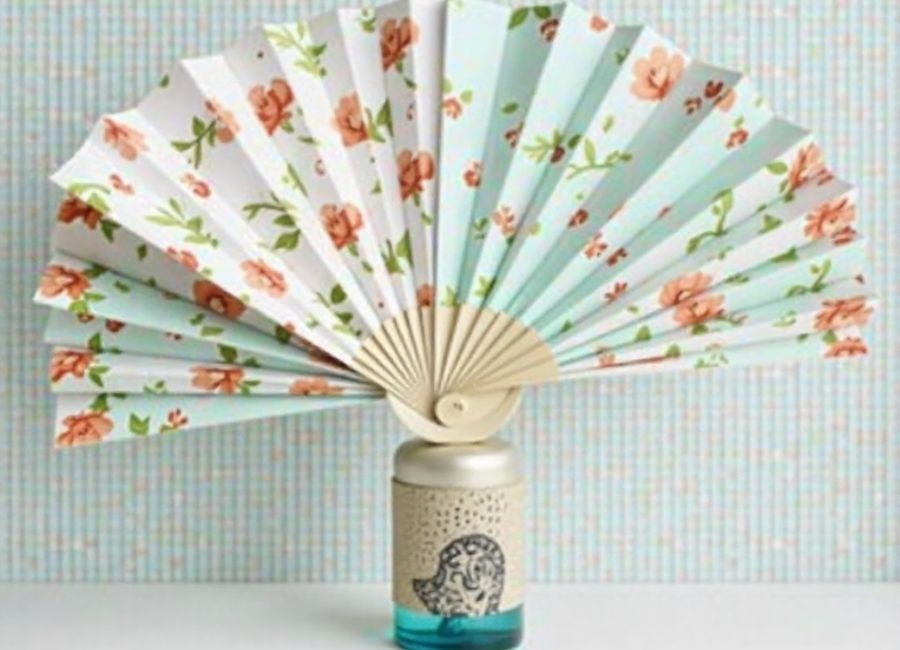
Enhancing Your Paper Fan
Once you’ve mastered the basic technique, consider these creative variations:
Decorative options:
- Use patterned or colored paper for visual appeal.
- Draw or paint designs on the paper before folding.
- Add stickers or stamps to create themed fans.
- Use magazines or sheet music for unique textures.
Size variations:
- Create mini fans using half sheets of paper.
- Make large ceremonial fans with poster-size paper.
- Experiment with different paper shapes for unique fan forms
Functional improvements:
- Attach a wooden craft stick to the handle for a better grip.
- Use double-sided tape for a cleaner handle finish.
- Reinforce the handle area with cardboard for durability.
Troubleshooting Common Issues
Fan won’t stay closed: If your fan springs open constantly, the folds may be too loose. Try refolding with firmer pressure, or secure additional points along the handle with small pieces of tape.
Uneven fan shape: This usually results from inconsistent fold widths. While you can continue with an uneven fan, starting over with more careful attention to fold consistency will produce better results.
Handle feels weak: Reinforce the handle area by wrapping it with tape or adding a thin strip of cardboard before securing. You can also extend the secured area slightly higher up the fan for added stability.
Creative Uses Beyond Cooling
Paper fans serve many purposes beyond personal cooling:
Event decorations: Create fans in event colors for weddings, parties, or celebrations. Large fans can be mounted on walls as decorative elements.
Educational tools: Teachers often use paper fans to demonstrate air movement, weather patterns, or as props in cultural studies lessons.
Emergency situations: A paper fan provides immediate cooling relief when air conditioning fails or during outdoor activities in hot weather.
Gift wrapping accessories: Small decorative fans can be attached to gift packages as both decoration and a practical addition.
Making Paper Fans a Learning Experience
This simple craft offers valuable learning opportunities. Children develop fine motor skills through the precise folding required, while also learning about patterns, symmetry, and basic engineering principles. (Symmetry Hearts Printing – Happy Tot Shelf, 2024)
The repetitive folding motion can be surprisingly meditative for adults, providing a brief mental break from daily stresses. The immediate practical result—a functional cooling tool—offers instant gratification that many crafts lack.
Your Next Paper Fan Adventure
Creating a paper fan requires nothing more than paper and patience, yet the result is both beautiful and functional. This timeless craft connects you to generations of people who have used similar techniques to create cooling relief and decorative objects.
Start with the basic technique outlined here, then experiment with different papers, sizes, and decorative elements. Each fan you make will be slightly different, reflecting your personal touch and creativity. Keep a few sheets of decorative paper handy—you never know when you’ll need a quick cooling solution or want to create an impromptu gift.
The next time summer heat becomes overwhelming, remember that relief is just a few folds away.


