


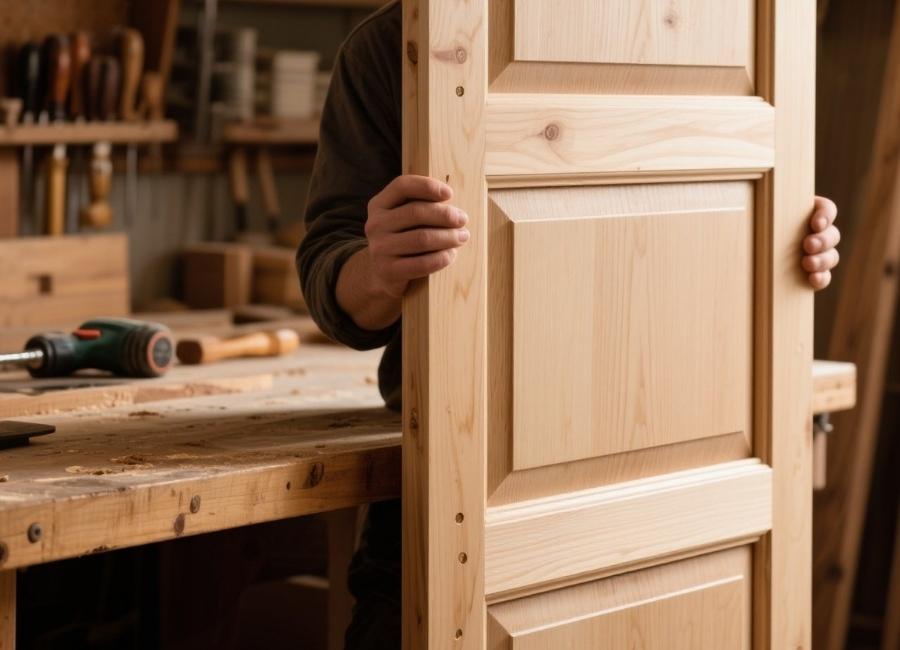
Making a raised panel door with stile and rail joinery is a classic woodworking skill. This method creates strong, attractive frames for cabinet doors, entry doors, and wall panels. It might look complicated at first, but once you learn the steps and tools, any dedicated woodworker can master it.
This guide takes you through each step, from setting up a reversible router bit to putting together your finished panel door. You’ll learn how to make a setup block, cut your rails and stiles accurately, and get a perfect fit for a professional result. By the end, you’ll be ready to take on projects that use this classic joinery.
What Are Rails and Styles?
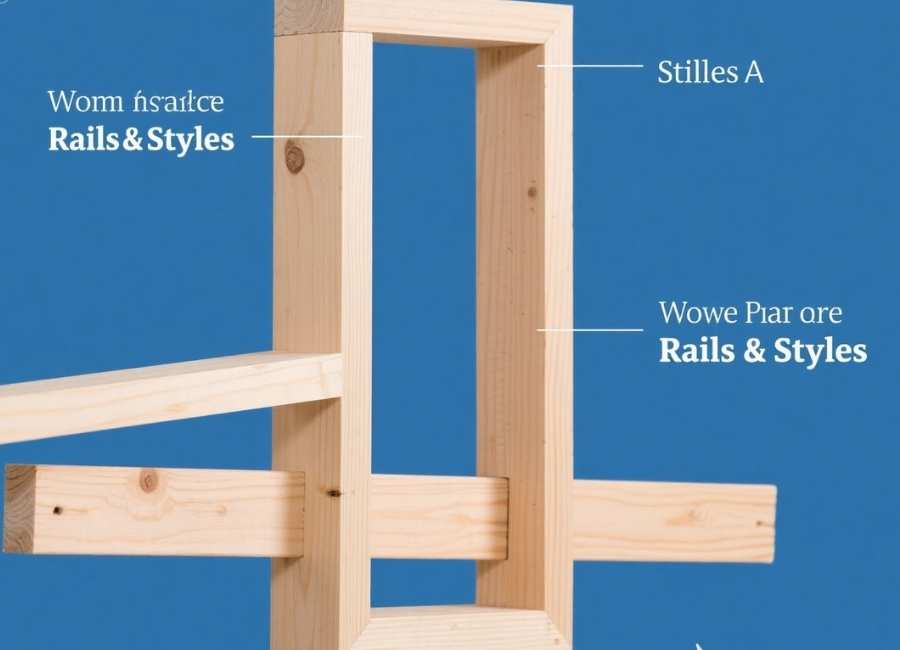
Before we get started, let’s go over some key terms. In a frame-and-panel assembly, each part has a specific name:
- Stiles: These are the vertical pieces of the frame.
- Rails: These are the horizontal pieces of the frame.
The stiles go the full height of the frame, and the rails fit between them. This way of building makes a strong, stable frame that holds a solid wood panel. The panel can expand and contract as humidity changes. (The Why of Shaker Panels: Stile and Rail Panel Construction, 2024)
Setting Up for Success: The Sizing Block
Getting precise results with stile and rail joinery starts with a good setup. Using a reversible panel frame bit takes a few important steps to get clean, accurate joints. The first thing to do is make a sizing or setup block.
1. Prepare Your Material
Begin with a piece of scrap hardwood, like maple, that’s at least half an inch thick. You’ll use this block to set the spacing for your joints later.
2. Configure the Router Bit
Go to your router Table. For this first step, use the profile cutter on your reversible bit. Set the bit height so the cutter cuts into the middle of your half-inch stock, leaving some wood uncut at the top and bottom. You won’t use the top slot cutter for this part.
3. Align the Fence
With the router unplugged, use a straightedge to align your router Table fence perfectly with the bit’s bearing. You want the bearing to be flush with the wall. If your fence has adjustable faces, bring them in as close to the bit as possible without touching it. This provides maximum support for your workpiece during the cutting process. Spin the bit by hand to ensure it doesn’t make contact with the fence.
4. Cut the Sizing Block
After you finish setting up, plug in the router. Use push blocks for safety and run your half-inch hardwood through the bit. This piece is now your sizing block, with the exact profile you need to test your rail and stile joints.
Cutting the Frame Pieces (Sticking Cut)
With your sizing block ready, you can start cutting the real frame pieces. The first cut, called the “sticking cut,” makes the decorative edge on the inside of both the rails and stiles.
1. Adjust the Bit Height
For the sticking cut, you’ll use the profile section of the bit. Adjust the height so that the cutter creates a small shoulder on the top edge of your stock and a small tongue on the bottom. The best way to visualize this is to run a test piece. You should see a distinct profile with a small, flat shoulder at the top and a thin wooden lip at the bottom.
2. Test the Fit
Take your test piece and fit the sizing block into its profile. They should fit together snugly, with the bottom surfaces even and just enough space for a thin layer of glue.
- If the joint feels loose, add shims between the profile cutter and the slot cutter on your bit.
- If the joint is too tight, remove some shims. Most reversible bits already have shims installed for this reason.
3. Mill Your Rails and Stiles
When the fit is right, mill the inside edges of all your rail and stile pieces. For this example, use wood that’s two inches wide. Keep the router bit set the same and run one edge of each frame piece through the router.
Making the Cross-Cuts (Coping Cut)
The coping cut goes on the ends of the rails. This cut makes a profile that matches the sticking cut, so the rails fit perfectly with the stiles.
1. Reconfigure the Router Bit
To get ready for the coping cut, change how your reversible bit is set up. Put the slot cutter on the bottom, then the bearing, and the profile cutter on top. Place the washers on top, and put any shims between the bearing and the profile cutter.
2. Set the Bit Height
Put the reconfigured bit back in your router Table. Adjust the height so the top edge of the slot cutter lines up with the top of the tongue on one of your frame pieces.
3. Test the Cut
Run a scrap piece through the router to make your first coping cut. Then test how it fits with a stile piece.
- If the stile piece sits higher than your test piece, the router bit is too high.
- If the stile piece sits lower than your test piece, the router bit is too low.
Adjust the bit height a little at a time until the two pieces fit together evenly.
4. Cut the Rails
Only make the coping cut on the ends of your rail pieces. To avoid tear-out when cutting across the end grain, use a backer board. Make one by running a scrap piece through the router with the same sticking profile. Put this backer board behind your rail as you cut. Use a miter gauge or a simple cross-cut jig to keep your cuts square and safe.
Cut the coping profile on both ends of each rail piece.
Assembling the Frame and Panel
Once all your pieces are cut, you can do a dry fit.
1. Assemble the Frame
Put the rails and stiles together. The joints should fit snugly, and the frame should lie flat. Check that the frame is square by measuring both diagonals—they should be the same length.
2. Measure for the Panel
To find the right size for your panel, measure the inside opening of your dry-fit frame. The panel edges will go into the same groove as the rail tenons. Add 5/8 of an inch to both the height and width to get the final panel size. This gives the panel a tongue to fit in the groove and leaves a 1/8-inch gap for wood movement.
3. Raise the Panel
Install a raised panel bit in your router Table. These are significant bits, so reduce your router’s speed and always use the guards. Start with the bit low and take several shallow passes on a test piece of the same thickness as your panel. Gradually raise the bit until the tongue left around the panel’s edge is a quarter-inch thick—the perfect size to fit into the frame’s groove. (Classic Door Joinery, n.d.) Once you have set the height, run all four edges of your panel.
4. Final Assembly
Perform a final dry fit of the frame and panel to ensure everything fits together correctly. For the final glue-up, apply glue only to the stile and rail joints. Do not glue the panel into the frame; it needs to be free to float to prevent the door from cracking or warping over time. (Frame and panel design, n.d.) Clamp the assembly, check for square one last time, and let the glue dry.
Your Path to Finer Woodworking
Learning style and rail joinery let you take on many new projects. Setting up a reversible bit can feel detailed at first, but it gets easier with practice. The strong, clean, and professional results make it worth the effort. (Primed Stile and Rail Doors, 2024)
This guide gives you a good starting point for using this type of bit, but there are many other systems out there, including matched sets that are easier to set up. No matter what tools you use, always focus on precision, careful setup, and safety. Now you can build beautiful cabinet doors and more with confidence.


