


Have you ever come across an old piece of furniture that looks great but has a worn, scratched surface? You might want to grab some sandpaper and start fixing it up. However, if the furniture has a wood veneer, it’s important to stop and think. Sanding veneer is different from sanding solid wood, and making a mistake can damage your project.
This guide covers all the basics of sanding veneer. You’ll learn what veneer is, why it needs careful handling, and how to sand it safely, step by step. By the end, you’ll feel ready to refinish your veneered furniture and restore its look without risking damage.
What Is Wood Veneer?

Before sanding veneer, it’s important to know what it is. Wood veneer is a very thin layer of real wood, usually less than 1/8 of an inch (about 3mm) thick. These thin sheets are glued to a core made from cheaper wood or a material like particleboard or MDF.
Veneer has been part of furniture making for centuries. It lets makers create detailed designs, such as marquetry, and use rare woods more efficiently. A well-made veneered piece can be just as attractive and valuable as solid wood furniture. The main difference is the thin top layer. Since it’s delicate, sanding too hard can quickly remove it and reveal the core underneath.
The Risks of Sanding Veneer
The biggest risk when sanding veneer is sand-through. This occurs when you sand away the entire veneer layer in one or more areas, revealing the substrate beneath. This damage is very difficult to hide and almost impossible to reverse. Once the core is exposed, it won’t absorb stain or finish the same way as the surrounding wood, leaving a permanent, unsightly patch.
Another risk is creating an uneven surface. Applying too much pressure in one area can create dips or low spots, which will become obvious once a new finish is applied.
How to Tell If Your Furniture Is Veneered
Are you unsure whether you’re dealing with solid wood or veneer? Here are a few simple checks you can do:
- Look at the edges: On solid wood, the grain pattern continues smoothly around the edges. On veneered furniture, you may notice a thin line or seam where the veneer meets the edge, or the grain may stop suddenly. Sometimes, you’ll also see banding, which is a thin strip of wood covering the edge of the core panel.
- Check the Underside: Flip the piece over or look inside a drawer. The grain on the top surface should match the grain on the underside if the wood is solid. If the grain patterns are different, it’s likely veneer.
- Examine the Grain: Veneer often uses highly figured or “perfect” grain patterns that are book-matched (mirrored) across a surface. While possible with solid wood, this is a common characteristic of high-end veneered furniture.
A Step-by-Step Guide to Sanding Veneer
So, can you sand veneer? Yes, but you need to be very careful. Sanding veneer works best for taking off an old finish or gently smoothing the surface. It’s not a good method for fixing deep scratches or gouges.
Step 1: Clean the Surface Thoroughly
Before you begin, clean the entire piece with a mild soap and water solution or a specialized wood cleaner. This removes any dirt, grime, or furniture polish that could clog your sandpaper and interfere with the new finish. Let the piece dry completely.
Step 2: Choose the Right Sandpaper
This is the most critical step. You must use a fine-grit sandpaper to avoid damaging the delicate veneer.
- Start with 150-grit sandpaper. This is generally abrasive enough to scuff up an old finish without being too aggressive.
- Have 180-grit and 220-grit sandpaper ready for final smoothing.
Do not use coarse sandpaper, such as 60 or 80-grit, or a power sander on veneer. The chance of sanding through the veneer is too great. Always sand by hand.
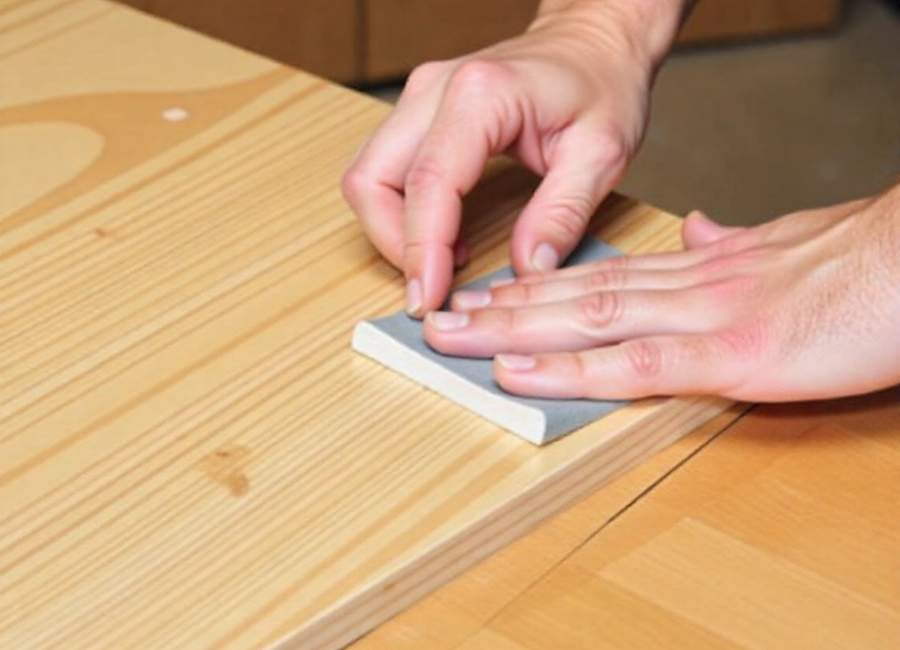
Step 3: Sand by Hand with a Sanding Block
Wrap your sandpaper around a sanding block. A block helps distribute pressure evenly, reducing the chance of creating low spots or accidentally sanding through an edge.
- Always sand in the direction of the wood grain. Sanding against the grain will create noticeable scratches that are difficult to remove.
- Use gentle, even pressure and let the sandpaper do the work. Your aim is to lightly scratch the old finish so the new one will stick, not to remove the finish completely.
- Check your progress frequently. Run your hand over the surface to feel for smoothness. Pay close attention to corners and edges, as these areas are the most vulnerable to sand-through.
Step 4: Remove the Dust
After finishing the first round of sanding, wipe the surface with a tack cloth or a slightly dampened microfiber cloth, moistened with mineral spirits. This step removes fine dust, helping you achieve a smooth and clean finish.
Step 5: Perform Final Smoothing
Switch to a finer grit sandpaper, like 180 or 220-grit, and give the surface one last light pass. This will smooth out any minor scratches left by the previous grit. Again, sand with the grain and use very light pressure. Clean away the dust with a tack cloth when you’re finished. Your surface is now ready for a new coat of stain, paint, or topcoat.
What If the Veneer Is Damaged?
If your veneer is peeling, chipped, or has deep gouges, sanding is not the solution. These issues require repair before you can proceed with refinishing.
- Peeling Veneer: Use a craft knife to gently lift the loose section and apply wood glue underneath with a small brush. Press the veneer down firmly, wipe away any excess glue, and clamp the area with a block of wood to protect the surface.
- Chipped Veneer: You can buy iron-on veneer tape or small veneer sheets from woodworking suppliers. Cut a patch slightly larger than the damaged area, matching the grain as closely as possible, and glue it in place.
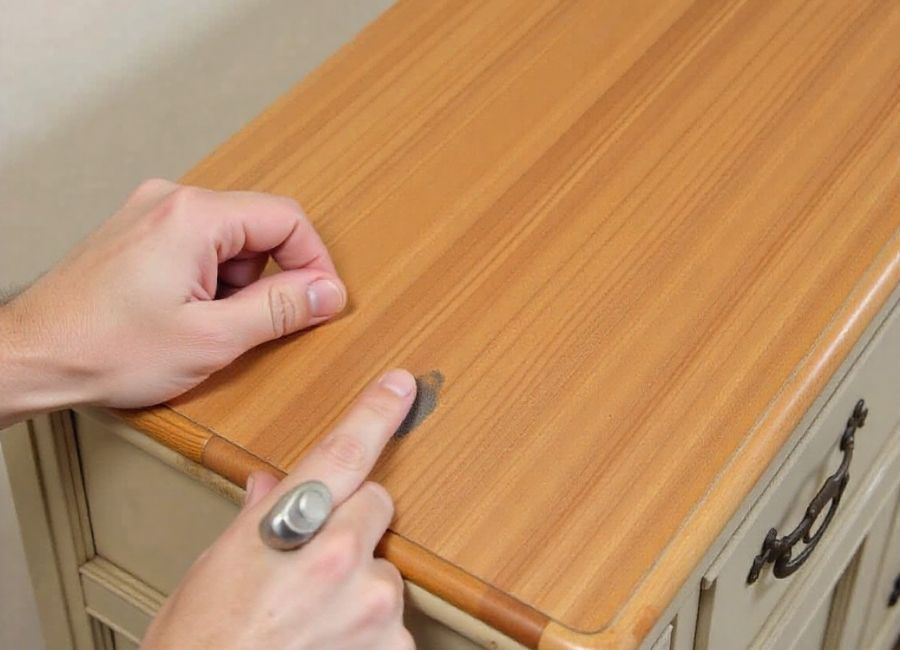
- Deep Scratches: For minor scratches that haven’t penetrated the veneer, you can often repair them with a wood stain marker or a wax repair stick that matches your finish.
Ready to Refinish?
Sanding wood veneer takes patience and a gentle approach. Use fine-grit sandpaper, work by hand, and check your progress often. The goal is to lightly scratch the surface, not to remove all the finish. With care, you can refresh your furniture and enjoy it for many more years.


