


Brick rised beds are growing in popularity among home gardeners, DIY enthusiasts, and urban farmers for their durability, aesthetics,and functionality. If you’ve wondering how to incorporate a stylish and practical plating solution into your garden, a brick raised bed might just be the perfect choice.
This guide will break down everything you need to know—from understanding the benefits of brick raised beds to step-by-step instructions on how to build your own. By the end, you’ll be ready to elevate your gardening game, quite literally, with this timeless solution.
Why Choose Brick Raised Beds?
Planting your garden in raised beds confers a whole host of benefits, but why specifically opt for brick? Here’s why brick raised beds stand out.
1. Durability
Bricks are built to last. Unlike wood, which can rot over time, brick resists water, pests, and decay. A properly constructed brick raised bed can last decades with minimal upkeep.
2. Better Soil Management
Raised beds allow you to have complete control over the soil within, and brick provides excellent temperature regulation. This means your plants will stay warmer in colder months and cool during hot spells.
3. Aesthetic Appeal
Brick raised beds have a classic look that complements almost any backyard or urban garden. Whether you prefer red bricks for a rustic feel or modern concrete bricks for a sleek look, brick adds undeniable charm.
4. Stability
Bricks are heavy and create sturdy planting structures, ideal if you are growing taller or bushier plants that need support.
5. Customizability
You can build brick raised beds in nearly any shape or size, allowing you to match your garden’s unique layout and catering to different plants’ spacing needs.
Things to Consider Before Building Brick Raised Beds
Before you roll up your sleeves, here are some essential factors to consider.
Location
Pick a sunny spot in your garden (most vegetables require at least 6 hours of direct sunlight). Consider the flow of water drainage and easy accessibility to your watering source.
Size
Your beds should ideally be no wider than 4 feet so you can reach the middle without stepping inside. The length can vary based on your space but keep practicality in mind. A standard height of 12–18 inches works well for most plants, though you might want taller beds for root vegetables or accessible gardening.
Type of Bricks
Opt for bricks designed for outdoor use. Reclaimed bricks can add character, but make sure they’re free from hazardous chemicals if growing edibles. Concrete blocks are also a budget-friendly alternative.
Drainage
Ensure your design takes proper drainage into account. The base of your bed should enable excess water to escape without pooling inside.
How to Build a Brick Raised Bed (Step-by-Step)
Creating a brick raised bed is a rewarding DIY project that combines practicality with craftsmanship. Here’s how to do it.
Materials You’ll Need
Tape measure
Bricks (calculate based on the size of your bed)
Mortar mix (or soil if building a dry-stacked bed)
Shovel
Trowel
Level
. Gravel or crushed stone for drainage
Step 1: Plan Your Design
Draw out your garden bed design, considering the dimensions, location, and shape of the bed. Use stakes and string to outline where the bed will go.
Step 2: Prepare the Site
. Clear the area of weeds, debris, and any large stones.
. Dig a shallow trench about 4–6 inches deep in the shape of your outline. This will serve as the foundation for your bricks.
Step 3: Lay the Base
. Fill the trench with gravel or crushed stone and level it out. This layer helps with stability and drainage.
. If using mortar, prepare a thick, cement-like mix according to the manufacturer’s instructions.
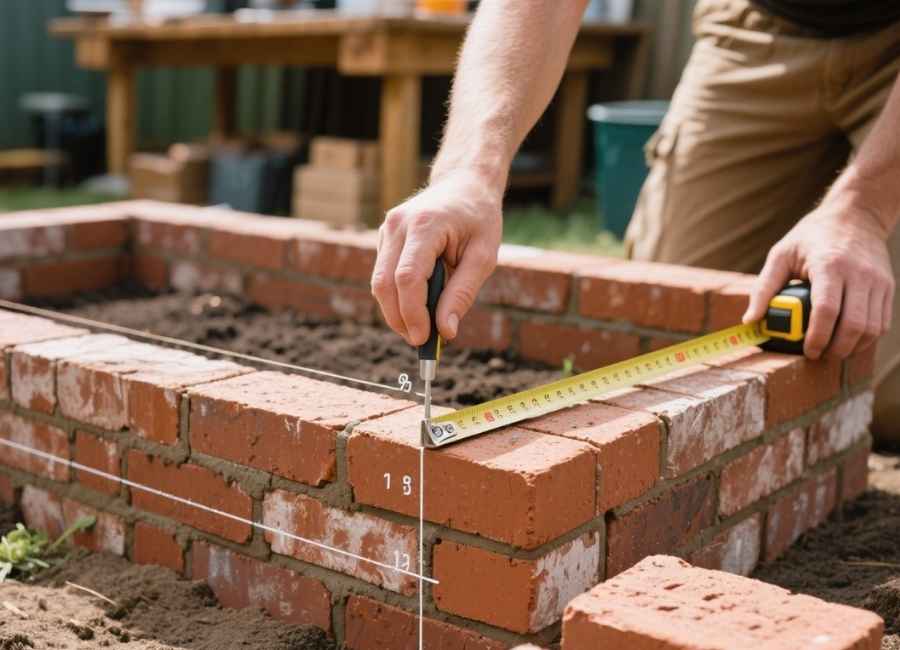
Step 4: Start Layering Bricks
. Lay your first layer of bricks directly on the prepared trench. Use a level to ensure they’re even. Adjust as needed.
For a mortar-based bed, apply a layer of mortar between each brick as you stack them.
For a dry-stacked (mortar-free) option, stagger each subsequent layer so the joints don’t align directly with the one below for extra strength.
Step 5: Build Up the Walls
Continue stacking bricks until you reach your desired height. Don’t forget to check that each layer remains level as you go.
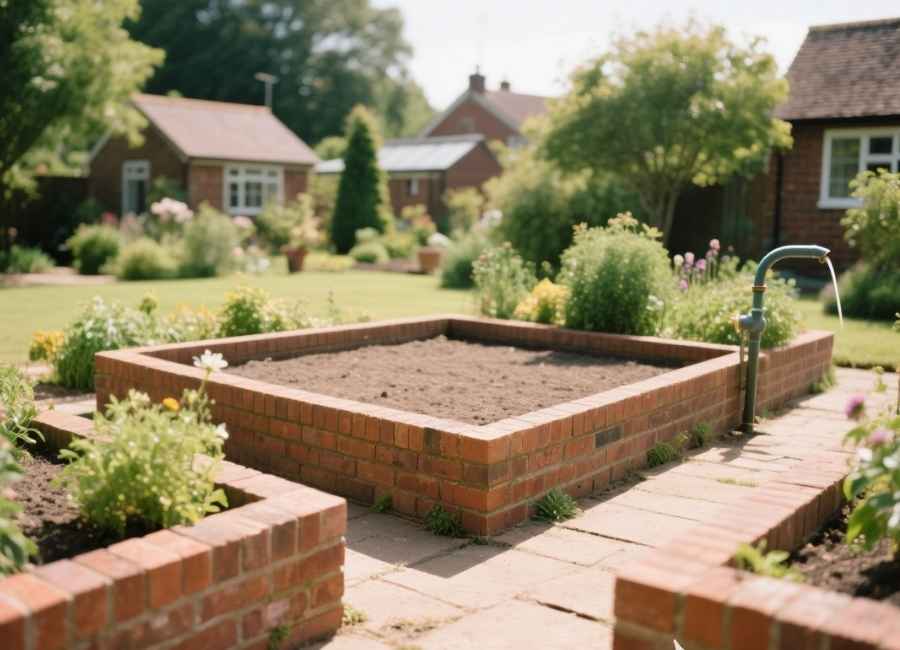
Step 6: Add the Soil
Once your brick wall is complete, fill the bed with a mix of healthy, nutrient-rich soil. A combination of topsoil, compost, and organic matter usually works best.
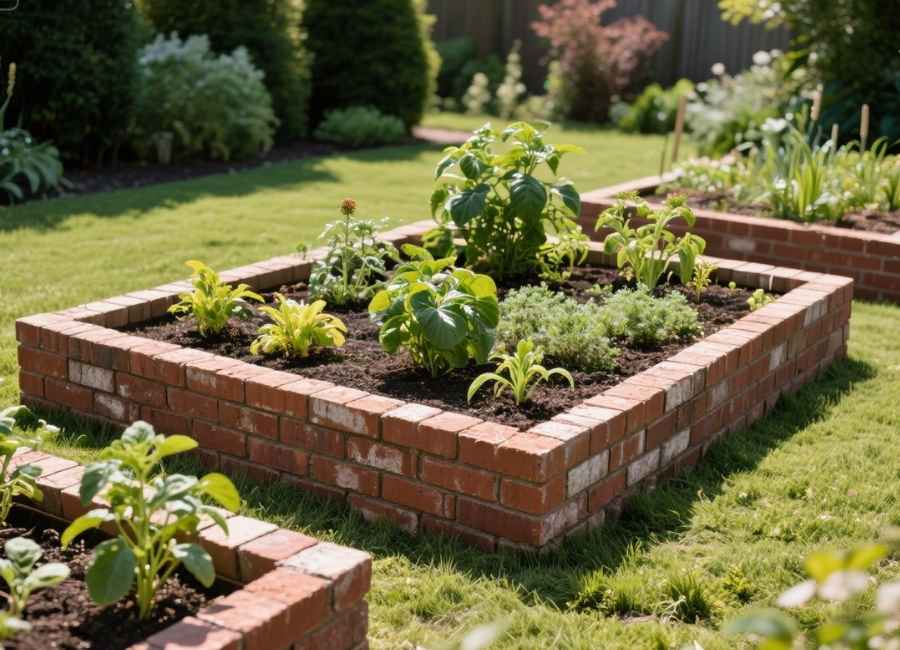
Step 7: Plant and Enjoy!
Now it’s time for the fun part! Plant your favorite vegetables, herbs, or flowers, and watch your new brick-raised bed flourish.
Tips for Maintaining Brick Raised Beds
Like any structure, brick raised beds will benefit from a bit of maintenance here and there. Use the following tips to keep yours in top shape.
. Inspect Regularly: Check for cracks or loose bricks, especially after heavy rain or freezing weather.
Seal the Bricks: Applying a water-repellent sealant every few years can extend the lifespan of the bricks.
Refresh the Soil: Each planting season, add fresh organic matter or compost to keep your soil rich in nutrients.
Inspiring Ideas for Brick Raised Beds
Looking for creative ways to incorporate brick raised beds into your garden? Here are a few ideas to spark inspiration.
. Curved Beds: Add visual interest by curving your raised beds instead of sticking to straight lines.
. Tiered Designs: Create multiple growing levels for a “garden staircase” look, perfect for small yards.
- Polished Tops: Place flat bricks on top of the walls for a clean, finished appearance that can double as seating.
Build Your Dream Garden
A brick raised bed isn’t just a functional addition to your garden; it’s a long-lasting, stylish structure that makes gardening easier and more enjoyable. Whether you’re growing vibrant vegetables, fragrant herbs, or colorful flowers, a brick bed gives you the flexibility, support, and aesthetics to create your dream garden space.
Once you’ve had a chance to build, share your results with your gardening community or take pride every time you see your plants thriving in their sturdy, new home.
Happy gardening!


