


A custom picture frame can make any photo stand out, but getting one made professionally can cost a lot. (How Much Does Custom Picture Framing Cost?, 2025) Making your own frames saves money and lets you add your own style to your Home. With just a few tools or a full workshop, you can build great-looking frames for your favorite photos.
This guide will show you three different methods for making a picture frame, ranging from a simple DIY approach to a more advanced technique using specialized woodworking machinery. We’ll cover the tools, materials, and step-by-step instructions you need to build a frame you can be proud of.
Simple Pine Frame with Handheld Tools
This first method is great for beginners and only needs a couple of common power tools: a miter saw and a handheld router. It’s a simple way to make a classic, sturdy frame.
Tools & Materials
- Miter saw with an auxiliary fence.
- Handheld router with a 3/8-inch rabbeting bit
- 1×2 select pine board
- Wood glue
- Painter’s tape
- Corrugated fasteners (optional)
- Sandpaper
- Wood stain and finish (e.g., lacquer)
Instructions
- Set Up Your Miter Saw: To get clean, accurate cuts, attach a plywood fence to your miter saw for better support and easier marking. Once it’s secure, set the saw to 45 degrees and make your first cut. Measure from the inside edge of the blade cut (the kerf) and mark the size you need for your picture, like 8 1/8 inches by 10 1/8 inches for an 8×10 frame.
- Create the Rabbet: The rabbet is a groove on the back of the frame that holds the glass, artwork, and backing. Use a handheld router with a 3/8-inch rabbeting bit to cut a groove along one edge of your pine board. Make two passes: start with a shallow cut, then go deeper to reach the full 3/8-inch depth. This step can get a bit dusty.
- Cut the Mitered Pieces: After cutting the rabbet, cut the frame pieces. Start with a 45-degree miter cut. To get the right length, line up the inner edge of the rabbet with your reference mark on the fence, not the end of the board. This way, the inside of your frame will fit your picture. Cut the two long sides, then the two short sides. For even cuts, you can stack two pieces and cut them together. Make sure the rabbet faces the right way on each piece so the corners fit together.
- Assemble the Frame: Lay the four frame pieces end-to-end with the outside facing down. Put painter’s tape across the joints. Add wood glue to the mitered ends, then fold the pieces together to make the frame and tape the last corner. Use extra tape to hold the corners tight while the glue dries.
- Reinforce the Corners: Pine is a softwood, so the miter joints might not be very strong. (What Is a Miter Joint? (Uses, Advantages & Disadvantages), n.d.) You can make them stronger with corrugated fasteners. Hammer these small, wavy metal pieces across each corner joint on the back of the frame. Try this on a scrap piece first to practice your technique.
- Stain and Finish: To make the pine look richer, use a wood stain. Test a few stains on a scrap piece to pick a color you like. Using a pre-stain conditioner can help avoid a blotchy look. After the stain dries, add a protective top coat, like spray lacquer, for a strong, polished finish.
Hardwood Frame with a Table Saw
This next method is for those with some experience. It uses a Table saw to make a more detailed frame from hardwood, like oak, and shows how to add design touches like chamfers.
Tools & Materials
- Table saw
- Miter saw
- Web clamp
- Bandsaw or hand saw
- Random orbital sander
- Oak or other hardwood
- Wood glue
- Sandpaper
- Whitewash pickling stain and Polycrylic finish.
Instructions
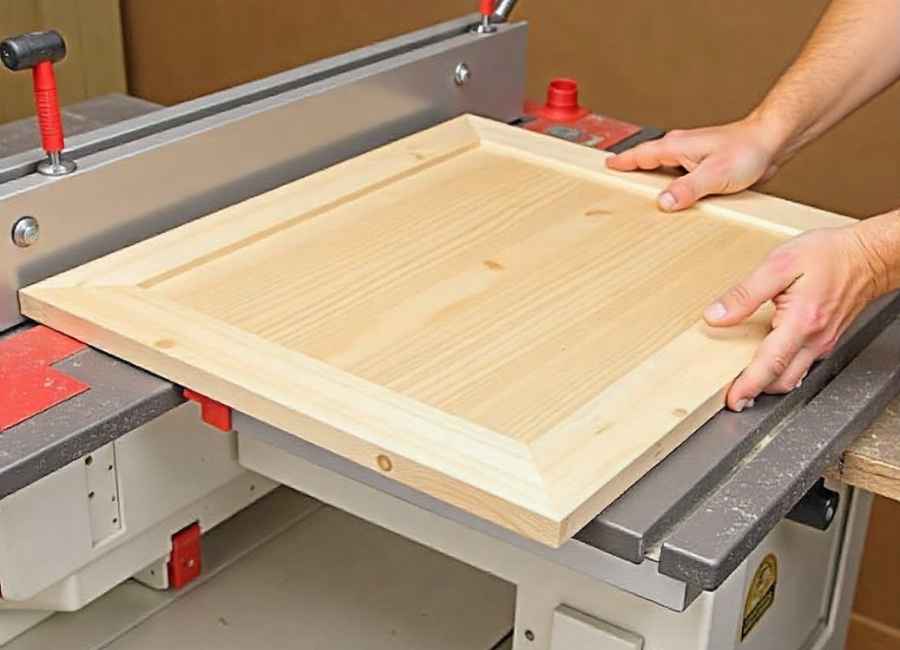
- Create the Profile on the Table Saw: Draw the frame profile you want on the end of your wood. First, cut a chamfer, or beveled edge, on the inside by tilting your Table Saw blade to 15 degrees. Use a featherboard to keep the cut steady.
- Cut the Rabbet: Use the Table saw to cut the rabbet next. Raise the blade to about 1/4 inch and make the first cut. Flip the board on its edge for the second cut to remove the waste. Make sure the waste piece is on the outside of the blade to avoid kickback. Smooth out any saw marks with a card scraper or sandpaper.
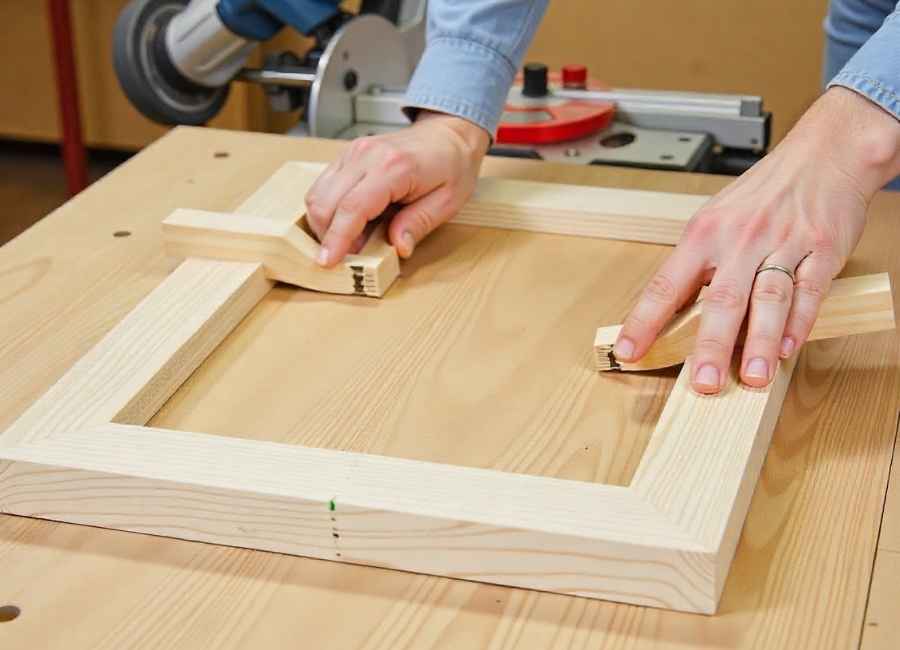
- Cut the Miters: Use your miter saw to cut the four frame pieces to length, just like in the first method. Double-check the rabbet direction before each cut to avoid mistakes. If you cut it wrong, you might have to make a smaller frame.
- Glue and Clamp: A web clamp works well for putting mitered frames together. It presses all four corners at once, so you get tight, gap-free joints. (Adjustable 4 Corner Framing Clamp Plan, n.d.) Put the corner supports on each joint and tighten the strap.
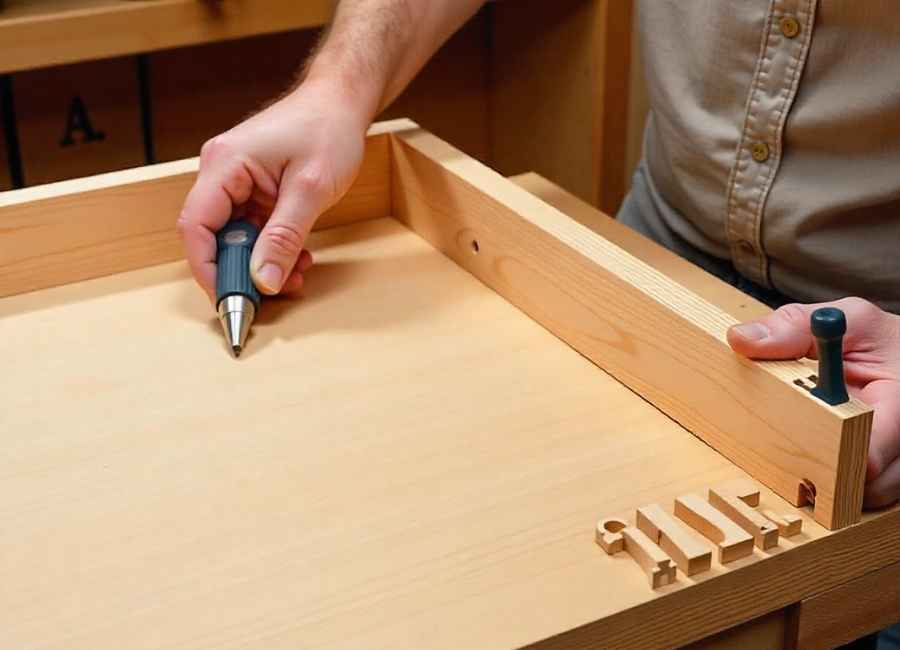
- Add Splines for Strength: Hardwoods like oak are too hard for corrugated fasteners, so adding splines is a better option. After the glue dries, use a spline-cutting jig on your Table Saw to cut a thin slot across each corner. Cut small, triangle-shaped wood pieces (splines) to fit the slots. Glue them in, let them dry, then trim them flush with a hand saw. Sand them smooth with a random orbital sander.
- Apply a Finish: For a light, beachy look, use a whitewash finish on oak. Put on one or two coats of whitewash pickling stain. When it’s dry, add a clear top coat like Polycrylic to protect the frame.
Detailed Profile Frame with a Router Table
If you want the most professional and custom results, a router Table is the best tool. It lets you make complex and elegant shapes that are hard or impossible to do with handheld tools.
Tools & Materials
- Router Table with various bits (e.g., cove, straight)
- Miter saw
- Web clamp
- Mahogany or other decorative hardwood
- Wood glue
- Painter’s tape
- Sandpaper (and a dowel for sanding curves)
- Clear lacquer finish
Instructions
- Shape the Profile: A router Table gives you lots of design options. (Smith & Eric, 2018) Start with a cove bit to make a sweeping curve on the inside edge of your wood. Make several passes, adjusting the bit height to get the shape you want. Then, use a straight bit to add small details, like a groove, for interesting shadow lines.
- Cut the Rabbet: You can also cut the rabbet on the router Table with a straight bit. A good router Table collects dust well, so your workspace stays much cleaner. (Perkins & Dennis, 2019)
- Sand the Profile: If your frame has a detailed profile, sand the wood before cutting the miters. Wrap sandpaper around a dowel to sand curves and reach small grooves.
- Cut and Assemble: Cut your mitered pieces on the miter saw with an auxiliary fence for best results. When putting the frame together, use both the tape method from the first frame and the web clamp from the second. The tape keeps the joints from slipping, and the web clamp gives even pressure. This helps you get perfectly aligned corners, even with complex shapes.
- Apply a Clear Finish: If you’re using a nice wood like mahogany, let its natural color show. A clear satin lacquer is a good choice. It dries fast and gives a strong finish that brings out the wood’s beauty without changing its color.
Your Next Woodworking Project
Making your own picture frames is a fun project for any skill level. Start with a simple method and try more advanced techniques as you go. You’ll build your woodworking skills and create custom decor for your Home. Now your favorite photos and prints can get the display they deserve.


