


Are your oak cabinets looking tired and outdated, but replacing them just isn’t in the budget? Don’t worry, there’s a simple and cost-effective solution that will completely revamp your kitchen or bathroom. Painting your oak cabinets can give them a modern, fresh look that breathes new life into your space. This guide walks you through the steps, tips, and tools you’ll need to paint your oak cabinets like a pro.
Whether you’re a DIY veteran or a first-timer, this guide is here to help you achieve a flawless and professionally finished result.
Why Paint Your Oak Cabinets?
Painting oak cabinets is a great alternative to replacing them. There are a number of benefits to taking on this DIY project:
- Budget-Friendly: Replacing cabinets can cost thousands, while painting saves you a significant amount of money.
- Customizable Look: Choose the color and finish that complement your space and reflect your personal style.
- Eco-Friendly: Reusing your cabinets cuts down on waste and doesn’t contribute to landfill buildup.
- Transforms the Space: A fresh coat of paint completely changes the feel of your kitchen without the need for a full renovation.
If you’re ready to get started, here’s your step-by-step guide.
Step 1 Prepare the Space
Painting cabinets is a project that requires preparation to ensure a smooth process and professional finish. Here’s how to set the stage:
Remove Doors and Hardware
- Start by taking all cabinet doors and drawers off their hinges.
- Remove all knobs, handles, and hardware for easier access. Store them in labeled plastic bags for easy reassembly.
Protect Your Surroundings
- Lay drop cloths over counters, floors, and appliances to prevent spills or drips.
- Use painter’s tape to protect walls, edges, and areas you don’t want to paint.
Clean Thoroughly
Oak cabinets tend to accumulate grease and grime over time, especially in kitchens. Use a degreasing cleaner to wipe down all surfaces, ensuring a clean base for painting.
Step 2 Sand the Cabinets
Sanding smooths the surface of your oak cabinets, making it easier for the primer and paint to adhere. Oak wood often has a noticeable grain, so this step is crucial.
- Use medium-grit sandpaper (around 120-grit) to sand every surface, including doors, drawers, and cabinet frames.
- Sand until the cabinets lose their glossy finish.
- Follow up with a finer grit (220-grit) to smooth any rough patches.
- Wipe down the surfaces with a tack cloth or damp rag to remove dust.
Pro Tip: For heavily grained oak cabinets, consider using wood filler to fill in the grain if you prefer a smoother, modern finish.
Step 3 Prime the Surface
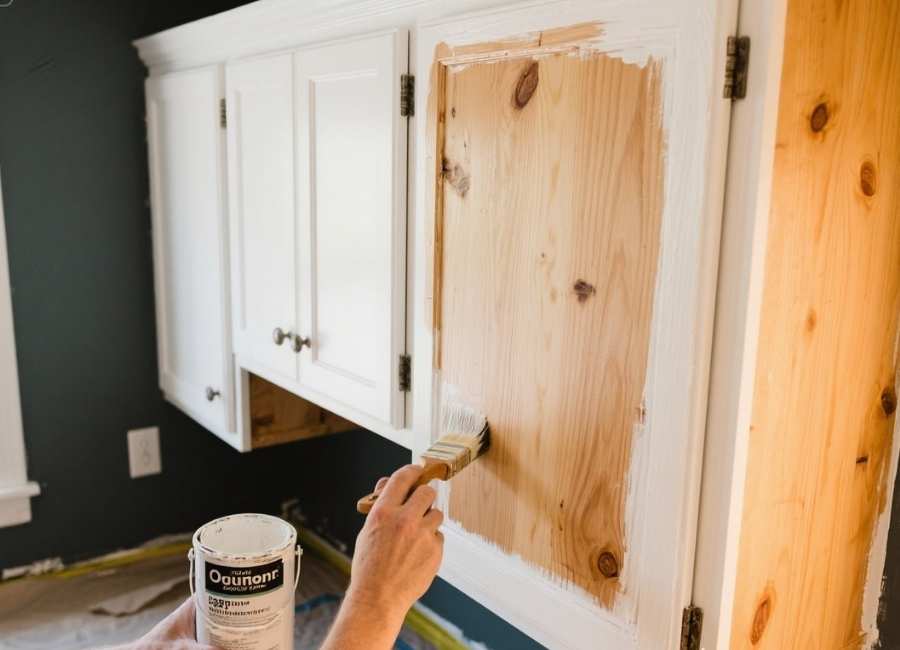
Priming your oak cabinets is an essential step to ensure durability and even color. Skip this, and you’ll find the paint peels or the grain shows through.
Choose the Right Primer
- Use a high-quality stain-blocking primer, which helps seal the tannins in oak wood and prevents them from bleeding through the paint.
- For grainy oak, consider a filler primer designed to smooth the surface.
Apply the Primer
- Use a paintbrush to get into nooks and corners first.
- Follow with a foam roller for larger, flat areas to achieve even coverage.
- Allow the primer to dry completely before moving to the next step (check the manufacturer’s instructions for drying times).
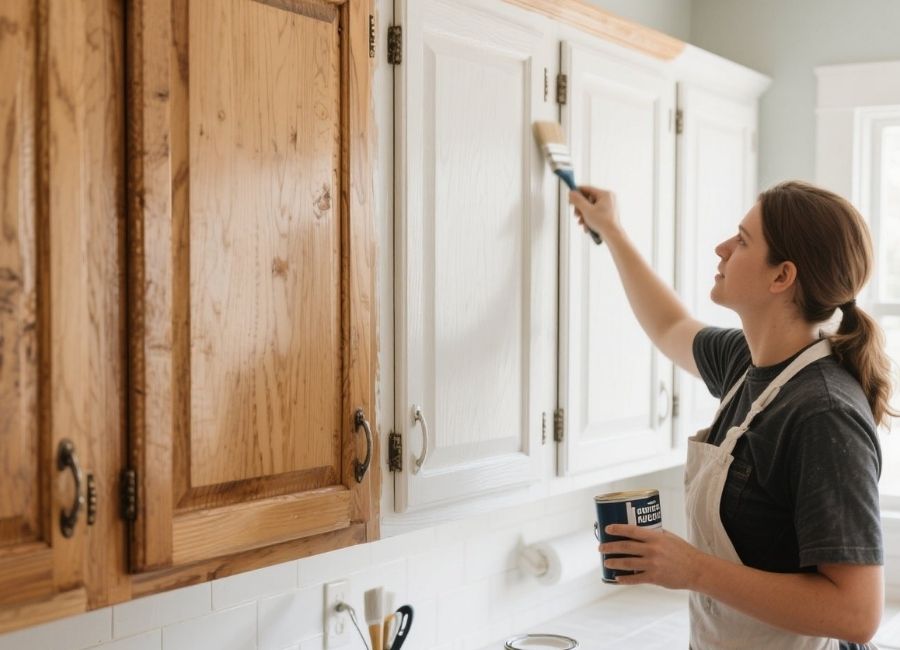
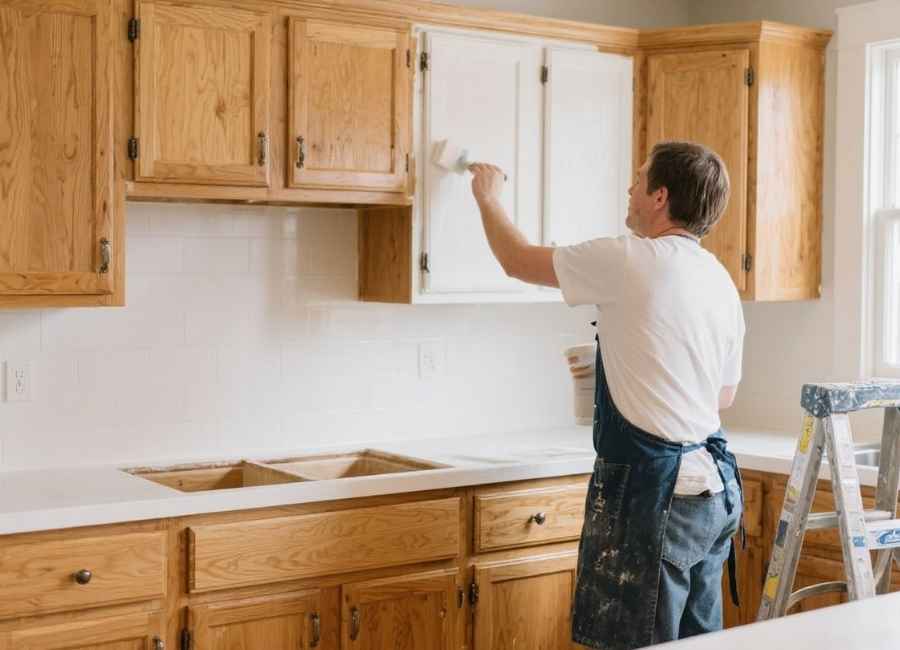
Step 4 Paint Your Cabinets
Now it’s time to bring your vision to life with paint. Selecting the right paint will make all the difference in achieving a polished, long-lasting finish.
Choose the Right Paint
- Finish: Satin or semi-gloss paint works best for cabinets as they are durable and easy to clean. Avoid flat finishes, as they don’t hold up well to scrubbing.
- Type: Acrylic latex or enamel-based paints are great options for cabinets. Enamel paints offer extra durability for high-traffic areas.
Tips for Applying Paint
- Start with a small paintbrush to work around edges, corners, and grooves.
- Use a foam roller for flat surfaces to avoid brush streaks.
- Apply the paint in thin, even coats. Two to three coats are recommended for the best coverage.
- Sand lightly between coats with fine-grit sandpaper (220-grit) for a smooth finish. Wipe away dust after sanding.
Allow each coat to fully dry before applying the next.
Step 5 Reassemble and Style
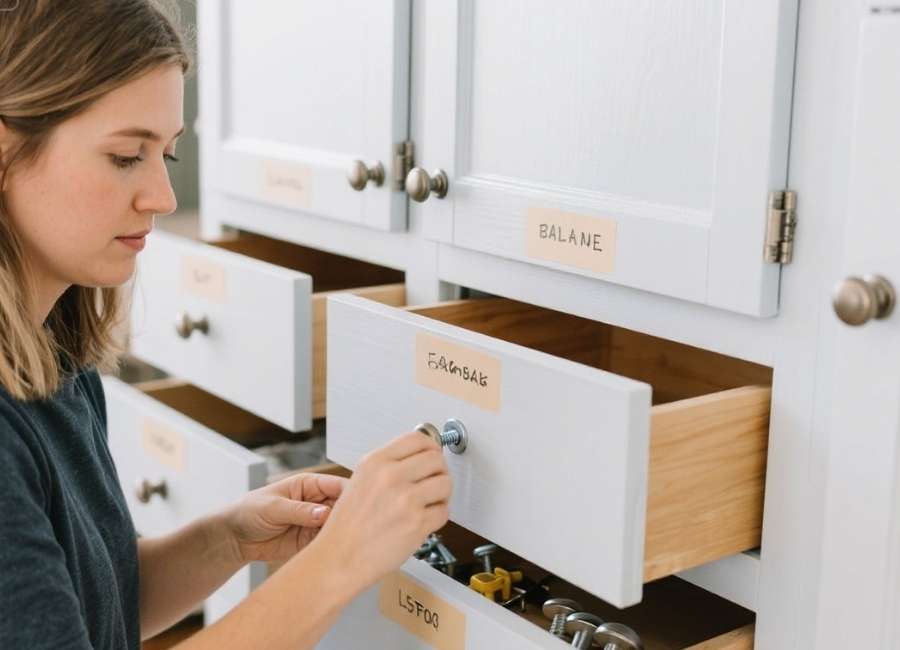
Once the final coat of paint has dried completely, it’s time to bring everything back together.
- Reattach the cabinet doors and drawers using the labeled hardware you set aside earlier.
- Screw handles and knobs back into place, or replace them with new ones to upgrade the overall look.
- Step back and admire your beautifully transformed cabinets!
Tips for a Professional Finish
- Work in a Dust-Free Environment: Dust and debris can easily ruin a painted surface. Clean your workspace thoroughly before starting.
- Use Quality Tools: Invest in high-quality brushes and rollers for a smoother finish and more precise application.
- Patience is Key: Allow sufficient drying time for primer and paint. Rushing this process can lead to smudging or uneven coverage.
Common Questions About Painting Oak Cabinets
How Long Will the Project Take?
Depending on the size of your kitchen and the drying time for paint and primer, the project can take around 3-7 days.
Do I Have to Remove the Cabinet Doors to Paint Them?
While it is possible to paint cabinets without removing the doors, removal ensures a much cleaner and professional finish.
Does Paint Cover Up the Oak Grain?
Paint can reduce the visibility of the oak grain, but it won’t completely eliminate it unless you use wood fillers or grain-filling primers.
Your Kitchen Awaits a New Look
Painting your oak cabinets is a rewarding DIY project that can dramatically improve the look of your kitchen, bathroom, or office. The best part? You’ll save money and avoid the hassle of a full renovation while creating a space that feels entirely new.
Are you ready to give it a go? Grab your tools, pick your favorite colors, and start painting. Your dream kitchen is just a weekend away!


