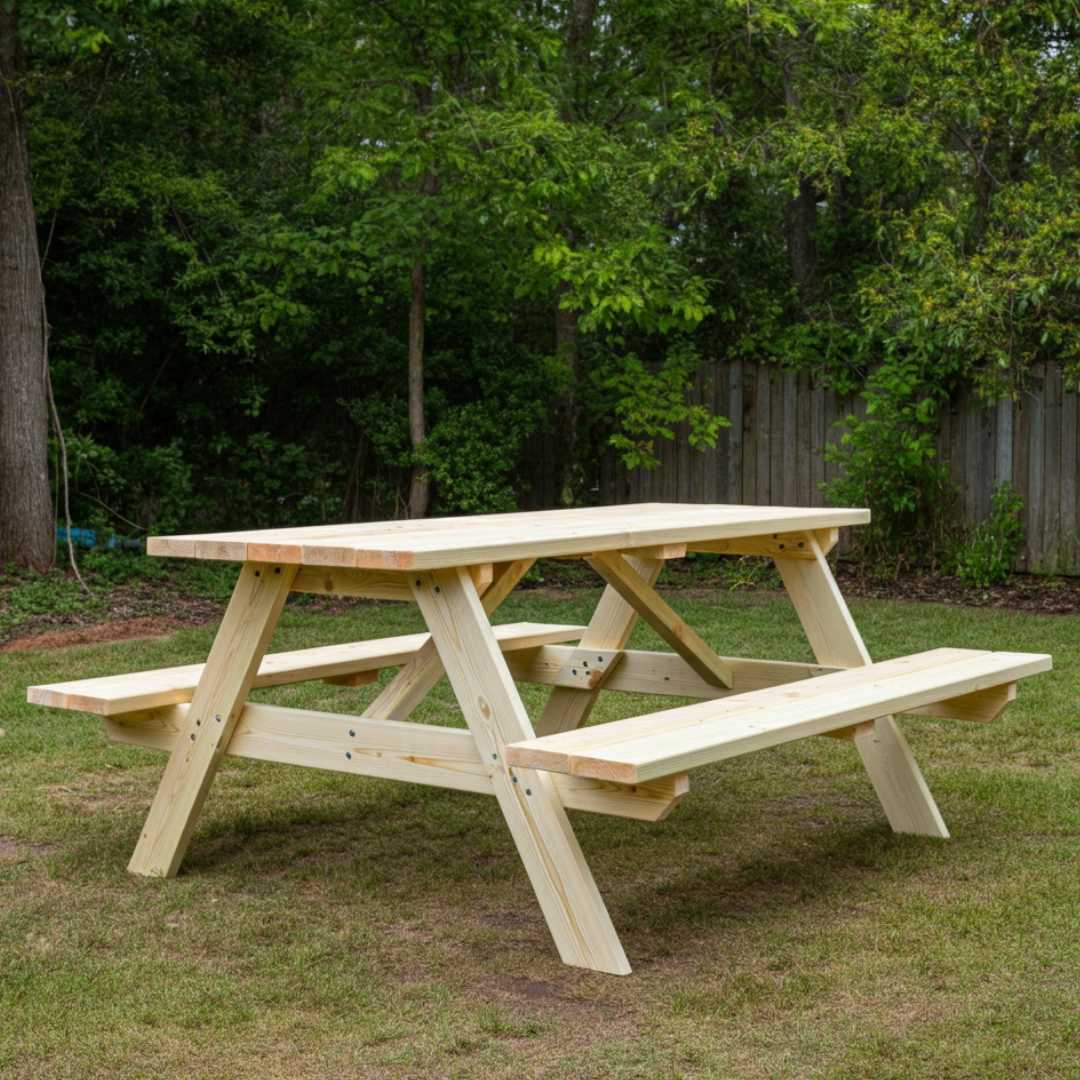
A picnic table in your backyard isn’t just a piece of furniture-it’s a multipurpose hub for meals gatherings, games, and cozy outdoor moments. Whether you want to enhance your backyard or create a functional addition for camping trips, buiding your picnic table can be a rewarding DIY project that combines creativity and practicality.
But where do you start? If woodworking feels daunting, don’t worry-we’ve got you covered. This step-by-step guide will you through building a sturdy, stylish picnic table from scratch. Designed to be accessible for beginners, we’ll help you transform a pile of lumber into your new favorite outdoor centerpiece.
Why Buid Your Picnic Table?
Before we jump into the “how,” let’s talk about the “why. ”
Cost-Effective
Store-bought picnic tables can be pricey, and customization is often limited. Building your own will save you money and allow you to control the design and materials.
Customization Options
Do you prefer a specific wood type, size, or color? Doing it yourself means buiding the perfect table for your space and taste.
Sense of Accomplishment
There’s nothing quite like completing a DlY project. Knowing you built it yourself will make every meal shared at your picnic table feel a little more special.
Outdoor Fun for All Seasons
A picnic table isn’t just for summer BBQs. Add an umbrella for shade, string lights for ambiance, and blankets when the wather cools-your table will become a year-round outdoor essential.
Getting Started: Materials and Tools
The Materials You’ll Need
Pressure-Treated Lumber: Opt for weather-resistant wood such as cedar, redwood, or pressure-trated pine for longevity. Here’s typical list:
2×6 boards for the tabletop and seats (around six boards, depending on the size of your table)
2×6 boards for the tabletop and seats (around six boards, depending on the size of your table) 2×4 boards for the frame and legs (two to four boards)
Galvanized screws or bolt(rust-resistant)
Wood Stalant or Sealant: Protects your table from the elements and gives it a polished finish Sandpaper or Power Sander: To smooth the wood and ensure a splineter-free experience.
Essential Tools
Saw: A circular saw or miter saw works well for precise cuts.
Cordles Drill: For fastening screws or bolts.
Measuring Tape and Pencil: Accuracy is key to a sturdy table.
Clamp: These are useful for holding boards steady while cutting or joining.
Carpenter’s Square’s Square: Helps ensure 90-degree angles for a professional finish.
6 Steps to Build Your Picnic Table
Plan Your Design
The standard picnic table design includes a tabletop, two benches, and four legs arraged in an “A” frame style. If you’re new to woodworking, stick to a classic rectangular table to make the process easier.
Measurements Check: Would you like a compact 4-foot table for intimate family meals or a sprawlina 8-foot option for hosting guests?
Sketch the dimensions and layout before cutting any wood.
Cut Your Lumber to Size
Cut the wood to match the dimensions the dimensions in your plan using your circular saw. For reference, a 6- food picnic table typically requires following cuts:
Tabletop planks (6ft each): 5-6 boards
Bench seating (6ft each): 2 boards
Legs and frame pieces (angled cuts may be required): Approx. 6-8 shorter boards.
Pro Tip: Sand the edges of your cuts for clean, safe surfaces.
Assemble the Frame
Start with the table’s base, which provids the structure for the top and benches. Lay the boards on a flat surface and use the following outline:
Attach the cross beams for stability.
Use your carpenter’s square to ensure the frame is perfectly rectangular. Uneven frames can create wobbly tables.
Fasten the parts using galvainzed screws or bolts, making sure each corner is secure.
Add the Tabletop and Benches
Position the planks for the tabletop above your frame, leaving small gaps (approximately / Inch) between each plank to allow for wood expansion during weather changes. Attach each plank with screws, ensuring everything is aligned before securing.
Repeat the process for the bench seats on both sides of the table.
Secure the Legs
Cut your table legs at an angle to achieve the classic”A”-frame look. Attach these to the underside of the frame, ensuring their weight is evenly distributed for stability.
Important Tip: Test the table’s sturdiness after attaching each leg!
Apply Finishing Touches Sand down the entire structure, focusing on edges and corners to eliminate sharp or rough areas. Apply a weather-resistant wood stain or sealant to protect against moisture and sunlight. Choose a natural finish to emphasize the wood grain or a fun pop of color to add personality to your backyard.
Allow the table to dry for at least 24 hours before use.
Handy Add-Ons for Your Picnic Table
A picnic table doesn’t need to be boring! Here are a few ideas to elevate your project: Add an Umbrella Hole: Drill a hole in the center of the table to accommodate an umbrella, which will offer snade on sunny days.
Build a Tabletop Cooler: Incororate a recessed bucket or pan for drinks and ice. Custom Paint Job: Personalize your table with patterns or stencils that match your garden decor.
Tips for Maintenance
Reapply sealant every year to maintain the wood’s condition.
Place your table in a shaded area to minimize fading due to sun exposure.
Use furniture covers or move the table under a roof during harsh weather.
Your Outdoor Oasis Awaits
Building your picnic table is a practical and gratifying project that creates memories alongside craftsmanship. Plus it’s an investment in your backyard space and learning new DIY skills. What are you waiting for? Roll up your sleeves, gather your tools, and bring your dream picnic table to life. Not only will it be functional, but it’ll also be a conversation piece you can take pride in whenever you say, “I built that myself!”


