A peeling veneer table can make even the most stylish room look a little shabby. If your beloved white veneer table is showing some wear and tear, don’t worry! With a little DIY effort, you can restore it to its former glory. Whether you’re a seasoned DIY enthusiast or a furniture restoration beginner, this guide will take you through the process step by step.
What You’ll Learn
By the end of this blog post, you’ll know confidently everything needed to repair your white veneer table. We’ll cover:
- Why do veneer tables peel
- Tools and materials you’ll need
- How to fix the loosened veneer
- How to replace missing veneer pieces
- Painting or sealing for a professional finish
Grab your tools and get ready to bring your table back to life!
Why Do Veneer Tables Peel?
Understanding why the veneer on your table is peeling can help you better prevent future damage. A veneer is a thin layer of wood or laminate that is glued to a solid or engineered wood base. Over time, the adhesive holding the veneer may weaken due to:
- Humidity and moisture: Changes in humidity can cause the veneer to swell or shrink, loosening the glue.
- Sunlight exposure: Prolonged UV exposure can make the veneer brittle and prone to cracking.
- Wear and tear: Daily use, spills, and general aging can cause the veneer to lift or peel over time.
Luckily, a peeling veneer doesn’t spell the end for your table. With a few simple steps, you can restore it to its original charm.
What You’ll Need
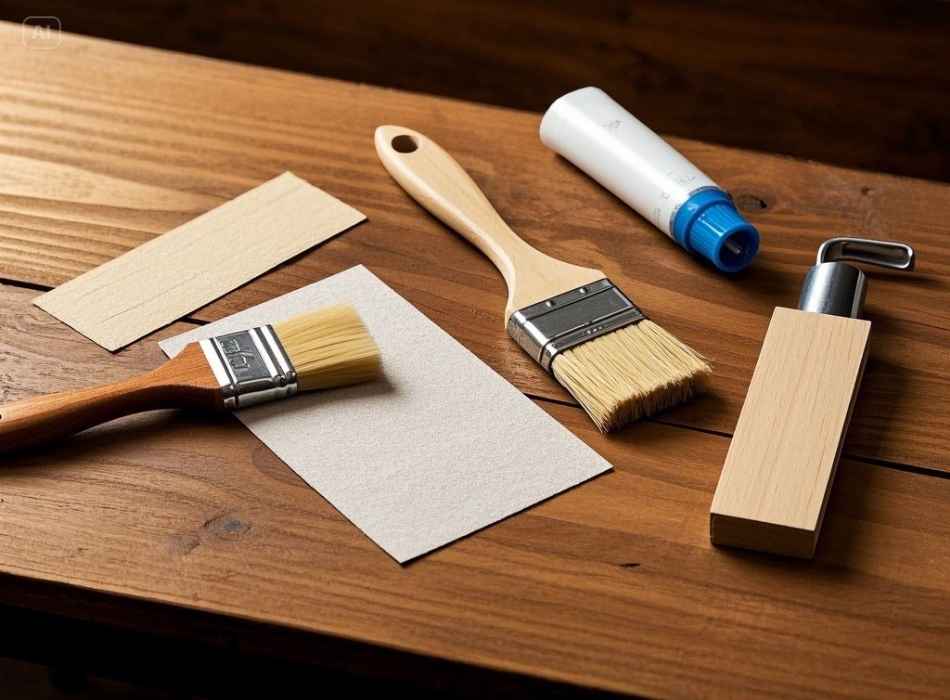
Repairing a veneer table isn’t complicated, but having the right tools and materials makes all the difference. Here’s what you’ll need:
Tools:
- Putty knife or scraper
- Sandpaper (medium-grit and fine-grit)
- Utility knife
- Cloth or sponge
- Paintbrush (optional)
Materials:
- Wood glue or contact cement
- Wood filler (for missing veneer sections)
- Veneer sheet (if replacing large sections)
- White paint or lacquer (optional for finishing)
- Clear sealer or polyurethane (for protection)
Now that you’ve gathered your tools, it’s time to get to work!
Step-by-Step Guide to Fixing a White Peeling Veneer Table
Step 1: Prepare the Surface
Before jumping into repairs, make sure the table is clean and ready for restoration.
- Clean the area: Wipe down the table with a damp cloth or sponge to remove dirt and debris. Allow it to dry completely before proceeding.
- Inspect the damage: Determine whether the veneer is loose, completely missing in some spots, or cracked. This will guide your next steps.
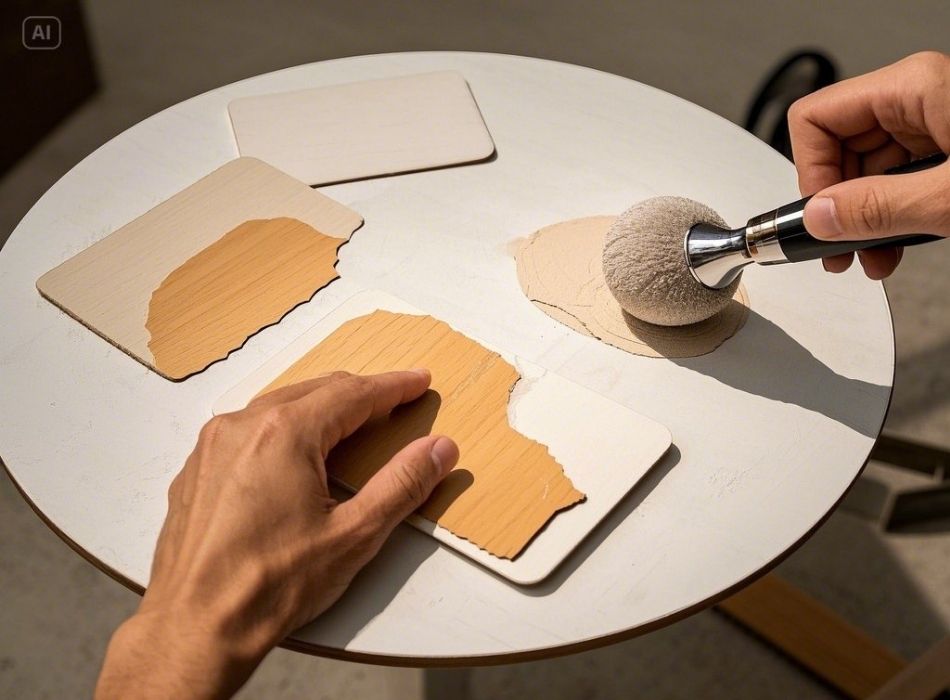
Step 2: Fixing Peeling or Loose Veneer
If the veneer has started lifting but isn’t broken, you can reattach it with glue.
- Apply glue underneath the peeling edge: Lift the loose veneer gently with a putty knife and apply wood glue or contact cement beneath it.
- Press it back down: Use your hands or a flat object to press the veneer firmly back into place. Wipe off any excess glue with a damp cloth.
- Secure with a heavy object: Place a stack of books or another heavy item over the glued area to hold it in place while it dries (usually 24 hours).
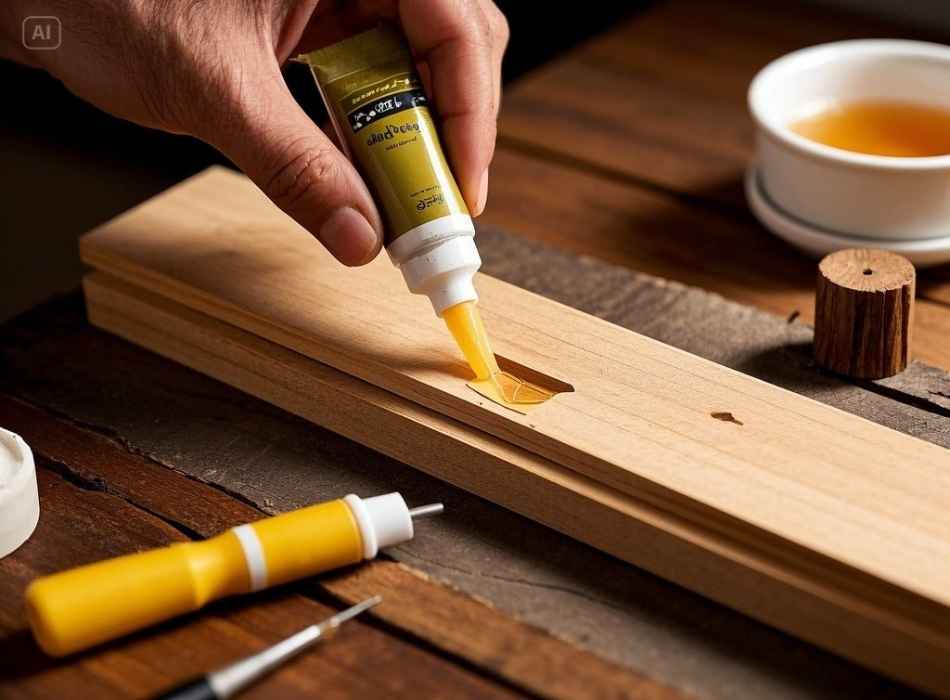
Step 3: Filling Gaps from Missing Veneer
If chunks of the veneer are completely missing, use wood filler to create a smooth surface.
- Cut away damaged edges: Use a utility knife to trim uneven or jagged edges around the missing veneer cleanly.
- Apply wood filler: Spread wood filler into the gaps where the veneer is missing, using a putty knife to create an even surface.
- Sand the area: Once the wood filler dries (check the product instructions), sand it down with medium-grit sandpaper, then switch to fine-grit for a smooth finish.
Step 4: Replacing Large Sections of Veneer
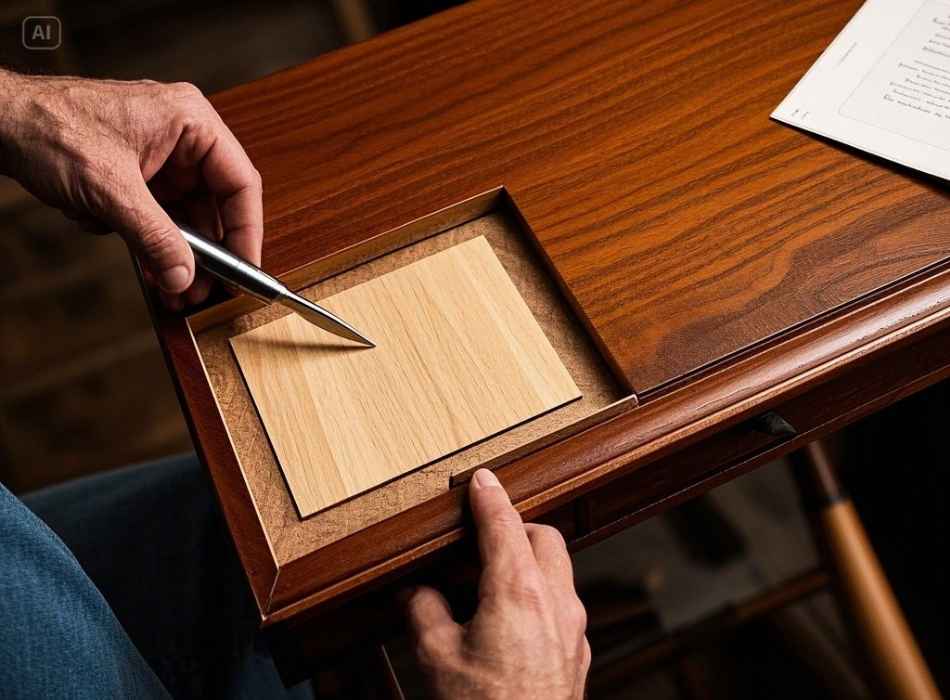
For areas where the veneer is beyond repair, replacing it may be the best option.
- Measure and cut a new veneer piece: Use a new veneer sheet and cut it to the size needed, leaving a tiny bit of overhang for precise trimming later.
- Glue and adhere to the new veneer: Apply contact cement to both the table surface and the back of the veneer sheet. Allow the glue to tack up slightly, then carefully press the veneer into place.
- Trim and sand: Use a utility knife to trim the edges and sand lightly for a seamless fit.
Step 5: Smooth and Sand the Entire Surface
With all repairs complete, sand the entire table lightly to create an even surface for painting or sealing. Be sure to sand with the grain of the wood to avoid scratches.
- For painted tables, sand any old paint to create a better base.
- For laminate veneer, focus on smoothing out the edges between the old and repaired veneer.
Step 6: Paint or Seal Your Table
To completely refresh your table’s look, add a coat of paint, lacquer, or clear sealer.
For Painting:
- Choose a high-quality white paint designed for furniture.
- Apply 2-3 thin coats with a paintbrush or foam roller, allowing each coat to dry thoroughly before adding the next.
For Sealing:
- Use a clear sealer or polyurethane to protect the repaired veneer and enhance its durability.
- Apply 1-2 coats with a paintbrush, following the manufacturer’s instructions.
Step 7: Final Touches
Inspect your work for any remaining imperfections, and give the table a final wipe to remove dust. Your white veneer table should now look as good as new!
Tips for Preventing Future Peeling
Once your table is restored, follow these tips to keep it looking great for years to come:
- Avoid placing the table in direct sunlight to prevent UV damage.
- Use coasters and placemats to protect the surface from spills and heat.
- Clean regularly with a damp cloth (avoid harsh chemicals).
- Consider using a dehumidifier if you live in a humid environment.
Restoring Your Veneer Table Is Worth It
Fixing a peeling white veneer table may seem intimidating, but with patience and the right tools, it’s a manageable project for any DIY enthusiast. By following the steps outlined above, you can save money on replacements and enjoy the satisfaction of breathing new life into your furniture.
Looking for more ways to tackle DIY repairs or make your furniture shine? Follow our blog for more tips and tricks, or drop us a comment below with any specific projects you’d love to see covered!