Refinshing wood furniture can breathe new life into your treasured pieces without the need for harsh stripping chemicals. Whether you’re looking to achieve a stunning transformation.
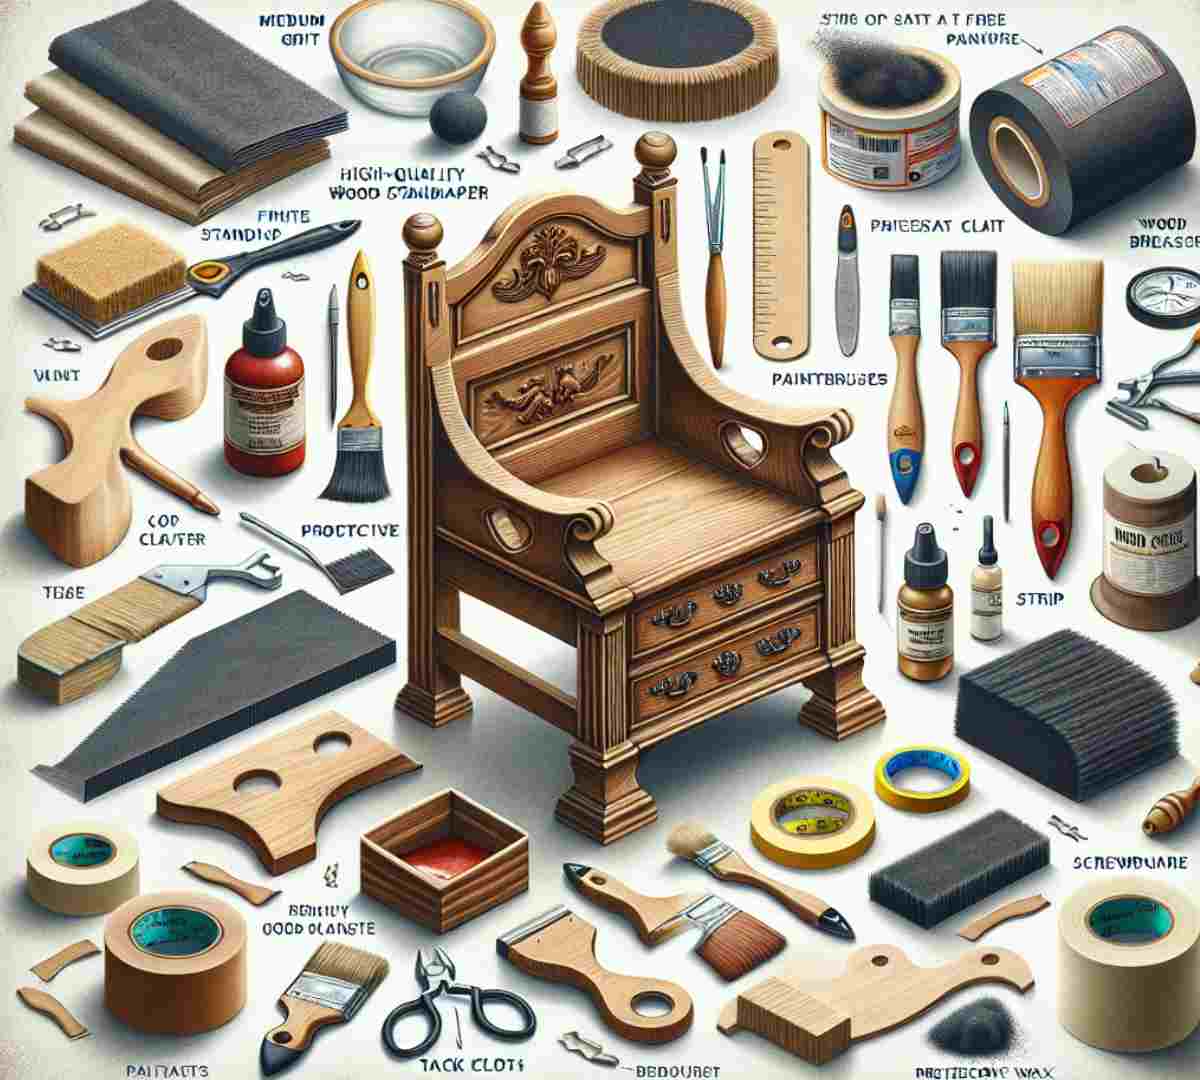
Materials Needed
To refinish your wood furniture without stripping. gather the following materials and tools:
Sandpaper (medium and fine grit)
Tack cloth for clening surfaces
Qualiy wood stain or paint of your choice
Protective finish ( polyurethane, varnish,or wax)
Paintbrushes or foam brushes
Painter’s tape (if needed for specific dessings)
Wood filler(if needed for specific designs)
Screwdriver or pliers (if the hardware needs to be removed)
Respirator mask or protective eyewear (for safety)
Step-by-Step Process
Preparation
Start by throughly cleaning the furniture to remove any dust or grime. Use a damp cloth or mild wood cleaner, then allow it to dry completely. This step ensure proper adhesion of the new finish.
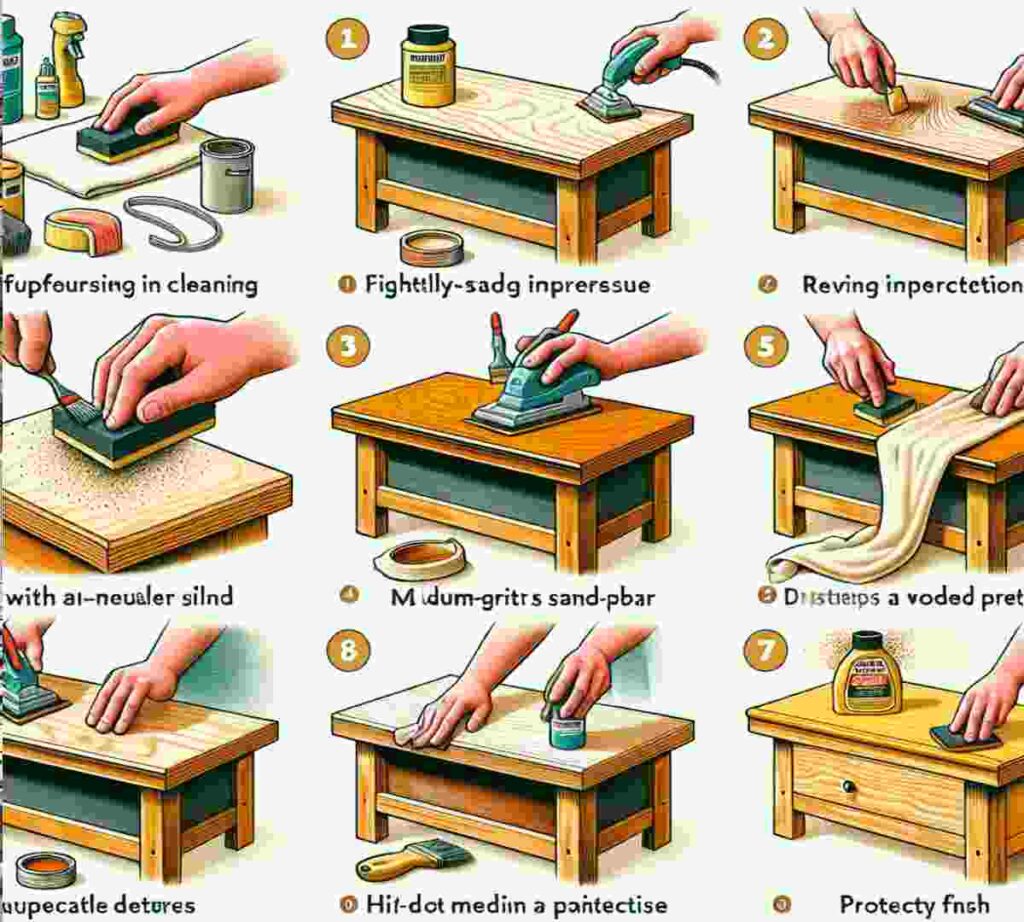
Sanding
Lightly sand the surface with medium-grit sandpaper to roughen the existing finish. This helps the new finish adhere better. Follow up with fine-grit sandpaper for a smoother feel. Remember to sand in the direction of the wood grain.
Repair Imperfections
If there are any scratches, dents, or gouges, fill them with a wood filler. Once dry, sand again to ensure a smooth surface. This will create a flawless base for your finish.
Staining or painting
Apply the wood stain or paint of your choice using a paintbrush or foam brush. Follow the recommended application method, ensuring even coverage. If using multiple coats, allow each coat to dry completely before applying the next.
Protect with a Finish
Once your stain or paint is dry, apply a protective finish such as polyurethane, varnish, or wax. This protects the new finish and provides a durable, long-lasting surface. Apply multiple thin coats, allowing each to dry throughly.
Reassembling
If any hardware was removed, reattach it to the furniture using a screwdriver or pliers. Ensure all pieces are securely in place.
Final Touches
If painter’s tape was used, remove it. Wipe the furniture with a tackcloth to remove any sanding dust, ensuring a clean finish.
Let it Cure
Allow the furniture to cure for the recommended time before using it. This step is essential for the finish to harden correctly, ensuring durability.
Safety First
Thoughout the process, ensure proper ventilation and use a respirator mask or protective eyewear as needed to safeguard your health.
Common Mistakes to Avoid
Avoid these common pitfalls for a successful refinishing project:
Skipping the cleaning step can lead to poor adhesion.
Not sanding the old finish enough causes bubbling or peeling.
Applying stain or paint too thickly results in uneven results.
You need to remember to allow each coat to dry completely, creating a sticky feel.
Neglecting to use a protective finish leaves the new finish vulnerable.
I was rushing the curing time, leading to premature wear.
Overlooking safety precautions, risking health hazards.
Before and After Transformations
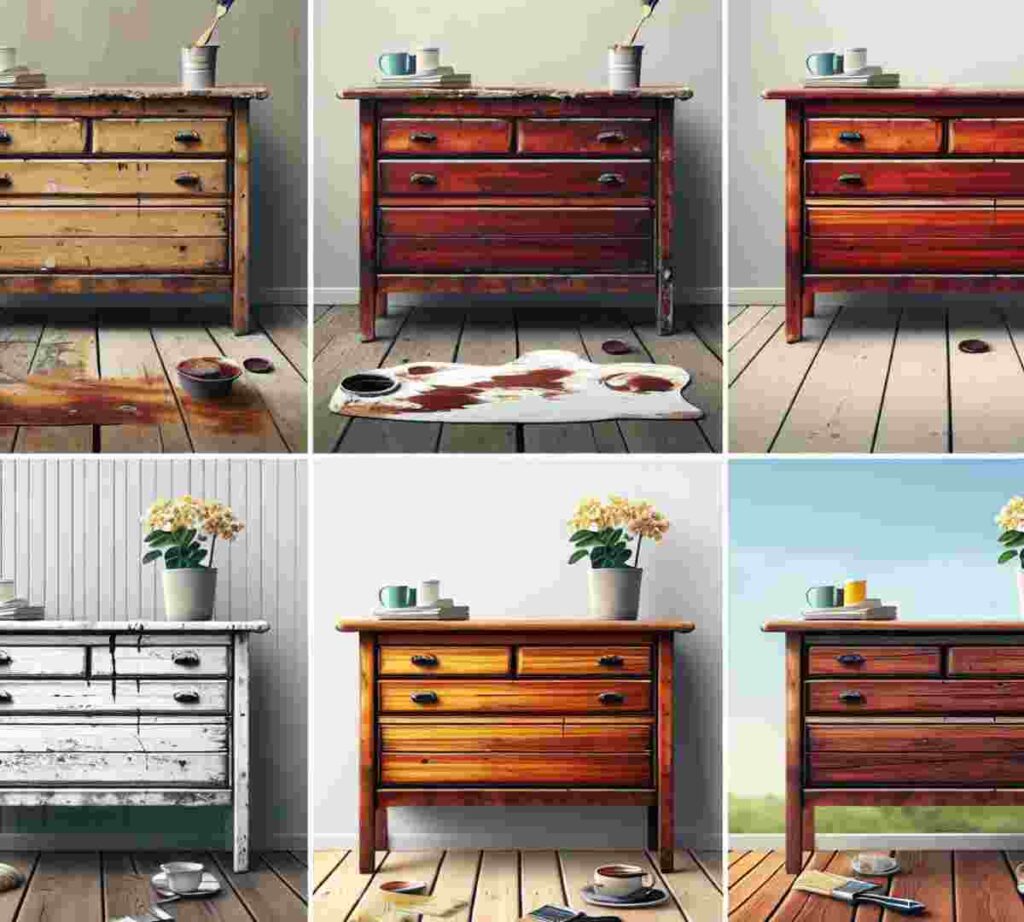
Example 1:
Before: A worn, dull wooden dresser with visible scratches and faded color.
After: It was transformed with a rich, deep mahogany stain, and the surface is now smooth and glossy, showcasing the natural wood grain.
Example 2:
Before: An old, chipped dining table with a stained, uneven finish.
After: Restored to a vibrant, even white paint finish, looking new and inviting.
Example 3:
Before: A tired, weathered outdoor bench with peeling paint.
After: Rejuvenated with a fresh coat of weather-resistant paint, now vibrant and ready for outdoor use.
Expert Tips
Choose the right finish for your furniture based on the wood type and desired look.
Test your chosen stain or paint in an inconspicuous area first.
Maintain a dust-free environment to prevent particles from marring the finish.
Apply multiple thin coast for a more even and professional finish.
Work in the direction of the wood grain for a natural appearance.
Allow ample drying time between coats, per the manufacturer’s instructions.
Regular maintenance can help preserve the fefinished furniture’s appearance.
With these steps and tips, you can achieve a beautiful, professional-looking finish without the hassle of stripping. Happy refinishing!